Showing posts with label butterfly poppy collage. Show all posts

Monday, 26 March 2018

Medieval Chalice created with Powertex


I had fun creating a medieval chalice from an old glass that I have had for years. If you look closely it is actually made from a recycle wine bottle cut in half. The old bottle base is cut off and stuck to the bottle pouring top. The upturned bottle therefore making a new glass. I didn’t make it myself but it was a present from my ex’s daughter and has sentimental value. Now I have a super chalice to fill with cider and enjoy my drink along with good memories.

I wanted to keep the rim of the glass clean as I intend to use it as a drinking glass. I can clean the inside properly and around the rim etc. after use. The outer decoration will be ok with rinsing but obviously will be washed with more care.
For those that of not heard of Powertex – it is a non-toxic environmentally friendly fabric hardener that can be used to treat natural fibres (cotton, wool, silk, wood, MDF etc.) and create items that are weatherproof.
I first stamped some tissue paper (recycled packaging) with Versamark Ink and heat embossed the script image (Butterfly Poppy Collage set from Chocolate Baroque) with metallic gold embossing powder. I also collected some MDF embellishments ready for decorating. The Ankh is from the Pyramid and Ank Trio set, the hares and small cross from the Mini Hieroglyphs set.
As I wanted to keep the glass for functional use I didn’t want to completely cover it with texture and wanted to keep the stem area comfortable to hold. I first painted a band of black ‘all surfaces’ weatherproof glitter paint (Black Diamonds Crystal Glitter) onto the glass to add some interest and texture which will show through the background areas that I wanted to keep fairly smooth. The gold paint that you can see on the base was done some years ago with glass paints – I covered this up in later steps.
Next I tore areas of the script paper and applied them over the glass stem and bowl using Easycoat Mat Decoupage Medium. Tip: I used a water pen to draw around the pieces that I wanted, making it easy to tear shapes in a more controlled way. I sprayed with a little Green Bister just to blend in a little (dabbing off excess dribbles) where the white tissue paper was a little obvious.
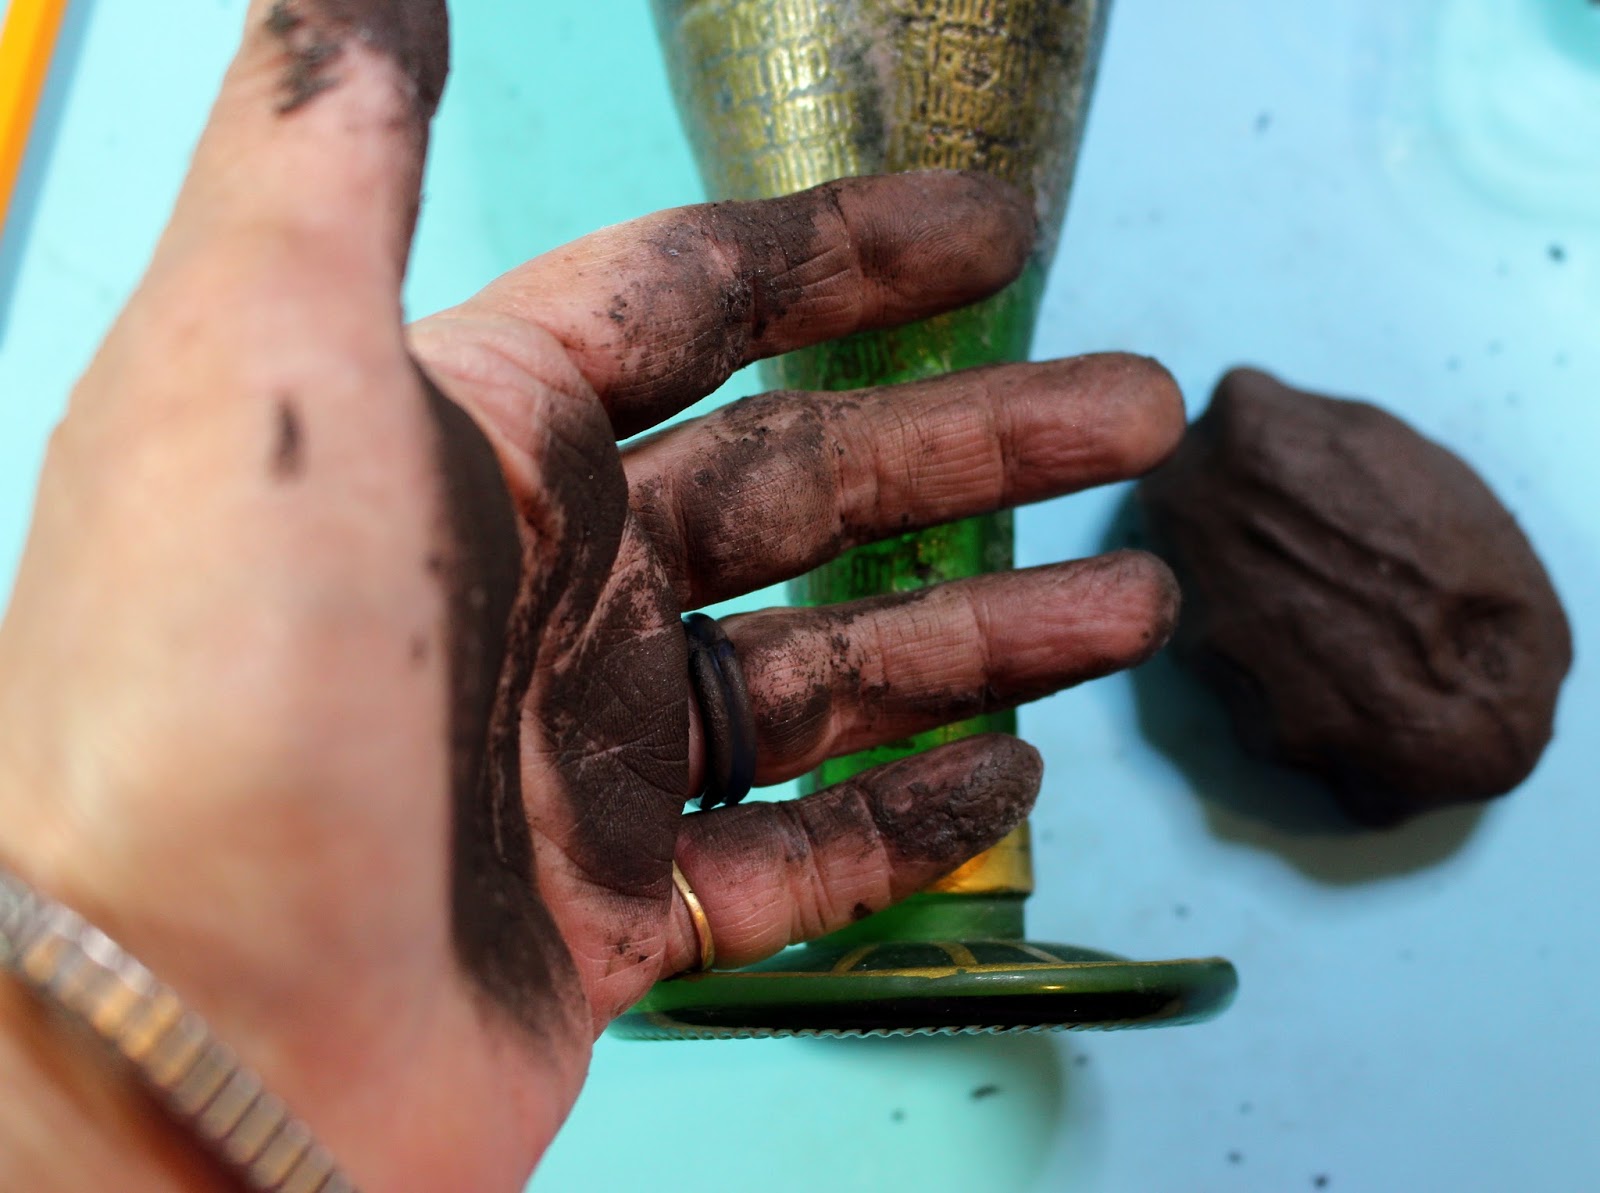
Next was true happiness – a fist full of Powertex Clay – tee hee. I mixed some Stone Art with Bronze Powertex (approx. 50:50) with a small addition of Transparent Powertex, working it well into a non-sticky consistency.
Next I cut of square of T shirt fabric to cover the glass base and treated it with Bronze Powertex. I also treated a strip of T-shirt yarn and used it to secure the fabric over the stem base, then wrapped it up around the glass. Snips of textured lace were treated and added around the base plus a strip of treated lace was added to create a border around the top.
A rough slab of clay was rolled out and impressed using the text stamp. This was glued onto the glass front using Powertex. Stems and leaves were moulded by hand and ‘glued’ in place along with the MDF embellishments. Where needed a little Easy Structure Paste was used as a 3D ‘glue’ (painted over with Bronze Powertex to hide the white colour). A faux gem was stuck into the centre of the ankh.
The chalice was then left to dry for a couple of hours.
Next came the fun of dry brushing. I used Rich Gold Colortricx mixed with Easy Varnish first. It looked a little uninteresting in just the one colour so I also dry brushed with some of the new Aqua Metallic Acrylic Ink. Both of these dry very quickly so I just repeated layers of dry brushing until I was happy with the result.
I will leave the vessel for a couple of weeks to fully dry and cure before giving it a final all over coat of Easy Varnish to fully seal it. Et voila! My lovely new drinking vessel. I cannot wait to use it.


Wednesday, 6 December 2017

Butterfly Poppy Collage card created for Chocolate Baroque

Good morning. This is the last of my recent samples for shows on Hochanda using lovely poppy themed stamp sets from Chocolate Baroque. I have so enjoyed working with these gorgeous stamp sets.


Materials:
How to make it:
  1. Wet the watercolour card and randomly spray with inks. When dry, lightly stamp all over with the large text collage stamp and Forest Moss Ink.
  2. Cut to fit the card front leaving a frame of approx. 1cm base card showing. Stamp the right hand side using both blue and pink inks, and the left plus background butterfly with blue ink. Note: To get a good stamped image on textured watercolour card you will need to press the stamp down a little harder than usual. It will never be as clear and crisp as when stamping on smooth card.
  3. Stamp the butterflies using blue ink onto the offcut piece of coloured watercolour card and cut out. Further colour the butterflies with alcohol and glitter pens. Add highlights to the butterflies and to the stamped poppy collage using white gel pen.
  4. Cut the shaped square mat from smooth card and stamp the poppy image with Versafine. Colour the background with Tea Dye and Tumbled Glass Distress Inks, blending with a sponge. Splash with water and blot off colour to give a mottled background. Colour the poppies with watercolour pens and edge the mat with gold gilding wax. Add highlights with white gel pen.
  5. Cut a rectangle mat in white card approx. 9 X 13cm (3.5” X 5”), stamp the text with Scattered Straw Ink, and blend in ink from around the edges. Further enhance the edges with black alcohol marker and mount the coloured poppy image to the left side using foam pads.
  6. Align and position the mat onto the watercolour card and cut around the stamped poppy collage with a craft knife so that the mat can be tucked under the cut section. Cut 2 flourishes from pink card.
  7. Finally glue everything to the card front, leaving the butterfly wings free for added dimension. Oooh, and add a bit of glitter to the poppy centres (got to be done – tee hee).

Poppy Shrine Card created for Chocolate Baroque

Good morning. This was another of my recent samples for shows on Hochanda using lovely poppy themed stamp sets from Chocolate Baroque.
Materials:
How it was made:
  1. The shaped card base was cut with the outer plain die (overhanging it just over the left hand fold of the card). The decorative frame was cut from metallic card and a black mat was cut using the plain dies.
  2. The text and poppies were stamped directly onto the card front. Colour was added with watercolour pens. The mat and frame were then mounted around the image with 3D foam for dimension.
  3. The poppies were stamped again onto watercolour card using watercolour pens to colour the stamp. A water brush was used to drag out the colour and more colour was added where needed. The 2 poppy flowers and bud were then cut out. I felt that the watercolour outlines were not really sharp enough so I laid my stamp onto my craft mat, coated it with Versafine, then pressed down the cut out flowers over the inked stamp (Sheena Douglass style – this is how she stamps up her ‘Perfect Partner’ die cut images). This added back stronger outlines and detail. I also added a few highlights with white pen. These were lightly shaped and decoupaged over the main image.
  4. Finally a little glitter glue was added to the poppy centres and butterfly. I also added clear glaze pen over parts of the leaves and butterfly.

Sunday, 26 November 2017

Vintage Poppies True Friend card created for Chocolate Baroque


Good morning. This is another of my recent samples created for Chocolate Baroque and Hochanda. This time I picked a pretty decorative paper to stamp onto. I am not sure where I got it from but think that it came in a mixed grab bag from Chocolate Baroque. You could use any suitable vintage decorative paper.

Materials:
  • Butterfly Poppy Collage and Pretty Poppies (the sentiment) stamp sets
  • A5 card blank, decorative vintage paper, textured cream pearlescent card, piece waste acetate
  • Versafine (Vintage Sepia), Distress Ink (Tea Dye)
  • Spectrum Noir Sparkle Pens (Sage, Biscuit, Summer Sky, Smokey Quartz)
  • Satin ribbon (green)
  • PVA pearls (dark green/gold)
  • Clear glitter glue
  • Alcohol marker (dark brown)
  • Glossy Accents
  • Rectangle dies for creating mat & layer (Heartfelt Creations Cut, Mat, Create set)
How it was done:
  1. The decorative paper was trimmed to fit the card front and a panel was cut out with the rectangle die. The topper and background were stamped using Versafine and coloured with sparkle pens. The card and topper were edged with Distress Ink and alcohol marker to frame. Note: The poppy image on the left hand side was ‘reverse stamped’ to create a mirror image. This was done by stamping onto waste acetate then transferring the ink by ‘stamping’ from the acetate. The background image on the right hand side was repeat stamped, lining up the diamonds, to extend it up the side of the card.
  2. The butterfly was overlaid with Glossy Accents. A larger rectangle was cut from pearl card for matting.
  3. The images were also stamped onto the pearl card and cut out to create the decorative embellishments. 3D glue gel was used to stick down elements.
  4. I added PVA pearls and a little clear glitter glue for extra sparkle (cannot help myself – tee hee).

Sparkling Trio of Butterflies card created for Chocolate Baroque


Good morning. I hope that you like my sparkly trio of butterflies created with the Butterfly Poppy Collage stamp set.

Materials:
How it was done:
  1. Sparkly ink was applied through the stencil onto the textured card panel. I then applied Versamark and heat embossed with sparkly clear powder. The card was edged with alcohol marker to frame.
  2. The butterflies were stamped with Versamark onto acetate and heat embossed with gold sparkle powder. The butterflies were then cut out, lightly shaped and glued over the stencilled images.

Monday, 23 October 2017

Transparent Poppies card created for Chocolate Baroque

Good morning. Today I am sharing one of my samples for the recent shows on Hochanda featuring the Pretty Poppies and Poppy Meadow stamps from Chocolate Baroque.


I coloured my scene using the fabulous alcohol markers from Chameleon. I simply love the new Color Tops that allow you to blend 2 completely different colours seamlessly – very tricky to do with standard alcohol pens.

Materials:
  • Pretty Poppies, Poppy Meadow, Nature Table, Butterfly Poppy Collage stamp sets
  • 8 X 8 inch card blank, 6.5 inch square card suitable for alcohol ink (I used Velvet Card) and scrap copy paper (to make masks)
  • Inkpads: Versafine (Onyx Black), Distress Ink (Tumbled Glass), Memento Dye Ink (London Fog)
  • WOW embossing powder (Clear Gloss)
  • Zig 2 way glue (temporary adhesive for masks)
  • Alcohol pens (yellow, green, blue, beige and pink): Chameleon Pens (YG3, YL2, BL3) and Color Tops (NU0, PK3)
  • Permanent marker (black)
  • Coloured pencils (black, green and pink/purple)
  • Water based fine tipped pen (light grey)
  • Gel pen (Hybrid Ink - black with metallic red)
  • Stickles glitter glue (Crystal)
How it was done:
  1. The card background was stamped with the honesty stamp and Distress Ink. The corners were stamped with Versafine and the edges blended lightly with Distress Ink.
  2. The foreground poppies were stamped onto copy paper and cut out to create masks. Small dots of zig glue were added to the back and left to dry (turns from blue to clear) to create a temporary stick to hold them in place.
  3. The foreground poppies were stamped with Memento (water based ink that will not bleed when colouring with alcohol ink pens) and then covered with the masks before stamping the background poppies.
  4. The stems were extended where needed by drawing with the fine tipped pen (NB. Make sure it is suitable for colouring with alcohol pens without bleeding – test if unsure).
  5. The image was then coloured with alcohol pens. I love the delicate transparent finish – perfect for delicate poppies. I used the new Chameleon pens with Color Tops. These enable really easy one step blending of one colour into the next. Leaves were coloured with YG3 and NU0 Color Top, Flowers with BL3 and PK3 Color Top, Buds with BL3 and NU0 Color Top, Butterfly with YL2 and and PK3 Color Top.
  6. A little texture and extra shading was added where needed with coloured pencils. The sentiment was stamped with Versafine and heat embossed with clear powder to emphasise. The card was edged with black marker to frame and glued to the card front with 3D foam for added dimension.
  7. The butterfly was stamped with Memento onto a spare scarp of card, coloured with alcohol pens and cut out. To enhance the butterfly details (the grey ink was a bit pale) I overstamped it with Versafine Ink.
  8. A little metallic ink was used on the butterfly and stamens. Further sparkle was added with Stickles glue.

Sunday, 1 October 2017

Friendship Gives Wings card created for Chocolate Baroque

Good afternoon. This is one of my recent show samples using the Pretty Poppies and Butterfly Poppy Collage stamps from Chocolate Baroque.


Materials:

How it was done:
  1. The poppies were stamped onto watercolour card and the stamps coloured with watercolour markers. I used a stamping press for this project – it is perfect for adding the different colours in layers and repeat stamping perfectly aligning with the previously stamped sections of the image. Similar can be done by applying all the colours needed over the stamp then huffing or very lightly spritzing to ensure that the watercolours are activated (otherwise some areas dry up a bit while working and don’t stamp well).
  2. The card was very lightly spritzed with water to encourage a little bleeding of the stamped image giving a soft watercolour effect. More colour was applied to the foreground poppies, picking up colour and applying with a damp brush.
  3. The sentiment and butterflies were stamped with Versafine. The butterflies were cut out, coloured and lightly shaped for added dimension.
  4. I painted over the butterflies with clear sparkle pen, and added dots of glitter glue on the butterflies and stamens.
  5. Finished with PVA pearls and added Glossy Accents to the butterfly bodies.