Saturday 30 June 2018

Steampunk Jewellery Plier Stands using Powertex

I have been meaning to decorate my jewellery plier stands for ages and finally got them finished.

I had a bit of a problem with these in that they started off as a plain varnished wood surface. I initially coated them with white Gesso with a view to painting them with acrylics. However, the Gesso did not bind well to the varnish layer – eek! All ideas were halted. These need to be fairly robust and a tonne of flaky chips after a short use was not what I wanted!

I then discovered Powertex and yay, I would be able to rescue and decorate my plier stands after all. Coating the entire surface with rice papers and torn kitchen towels would create a tough protective skin over the surface and prevent the feared chipping off of the base layers.

HOW IT WAS DONE
I first collected together lots of embellishments; die cut cogs and pipework (Sizzix dies), MDF Keyplate (Powertex), metal clock hand and chains, old light bulbs and screws.

I tore out images from Creative Rice Paper (Powertex). This particular sheet seems to be out of stock but there is a similar Victorian Steampunk Paper available. I also separated layers of kitchen paper and tore them into pieces to coat the surface. This would add texture and a protective layer.
STAGE ONE
First I applied the torn decorative papers using Easy Coat Mat Medium. Ivory Powertex was then painted on to blend in the image edges. 
STAGE TWO
Next layers of kitchen paper were bonded all over the surface. Some were glued down with Ivory and some with Terracotta Powertex. Die cut card embellishments were also coated with Powertex and glued down.
Texture was added by applying Easy Structure Paste through a texture stencil.
I also had a try at the rust technique. I mixed some Rusty Powder into Ivory Powertex along with a few drops of white wine vinegar. This was painted and dribbled over the surface (extra powder sprinkled on top) and spritzed with water and vinegar before leaving overnight to develop. I spritzed at intervals, several times. I avoided the areas that will be in contact with my pliers. 
STAGE THREE
Next I brushed over and added colour using Acrylic Inks in Tangerine, Egg Yolk, Aqua and Metallic Gold.  
STAGE FOUR
I also applied a little gold Pebeo Gilding Wax on some areas. When fully dry and cured (I left them for 3 weeks) I coated the surface with Easy Varnish to fully seal and protect.
I have included lots of images of how all the surfaces were built up.  
Texture and die cut cogs have been added. 
Rust and colour added. 
Side finished with stronger thick greyboard embellishments. Any large embellishments protruding from edges need to be strong (thinner card would be prone to warp and bend).
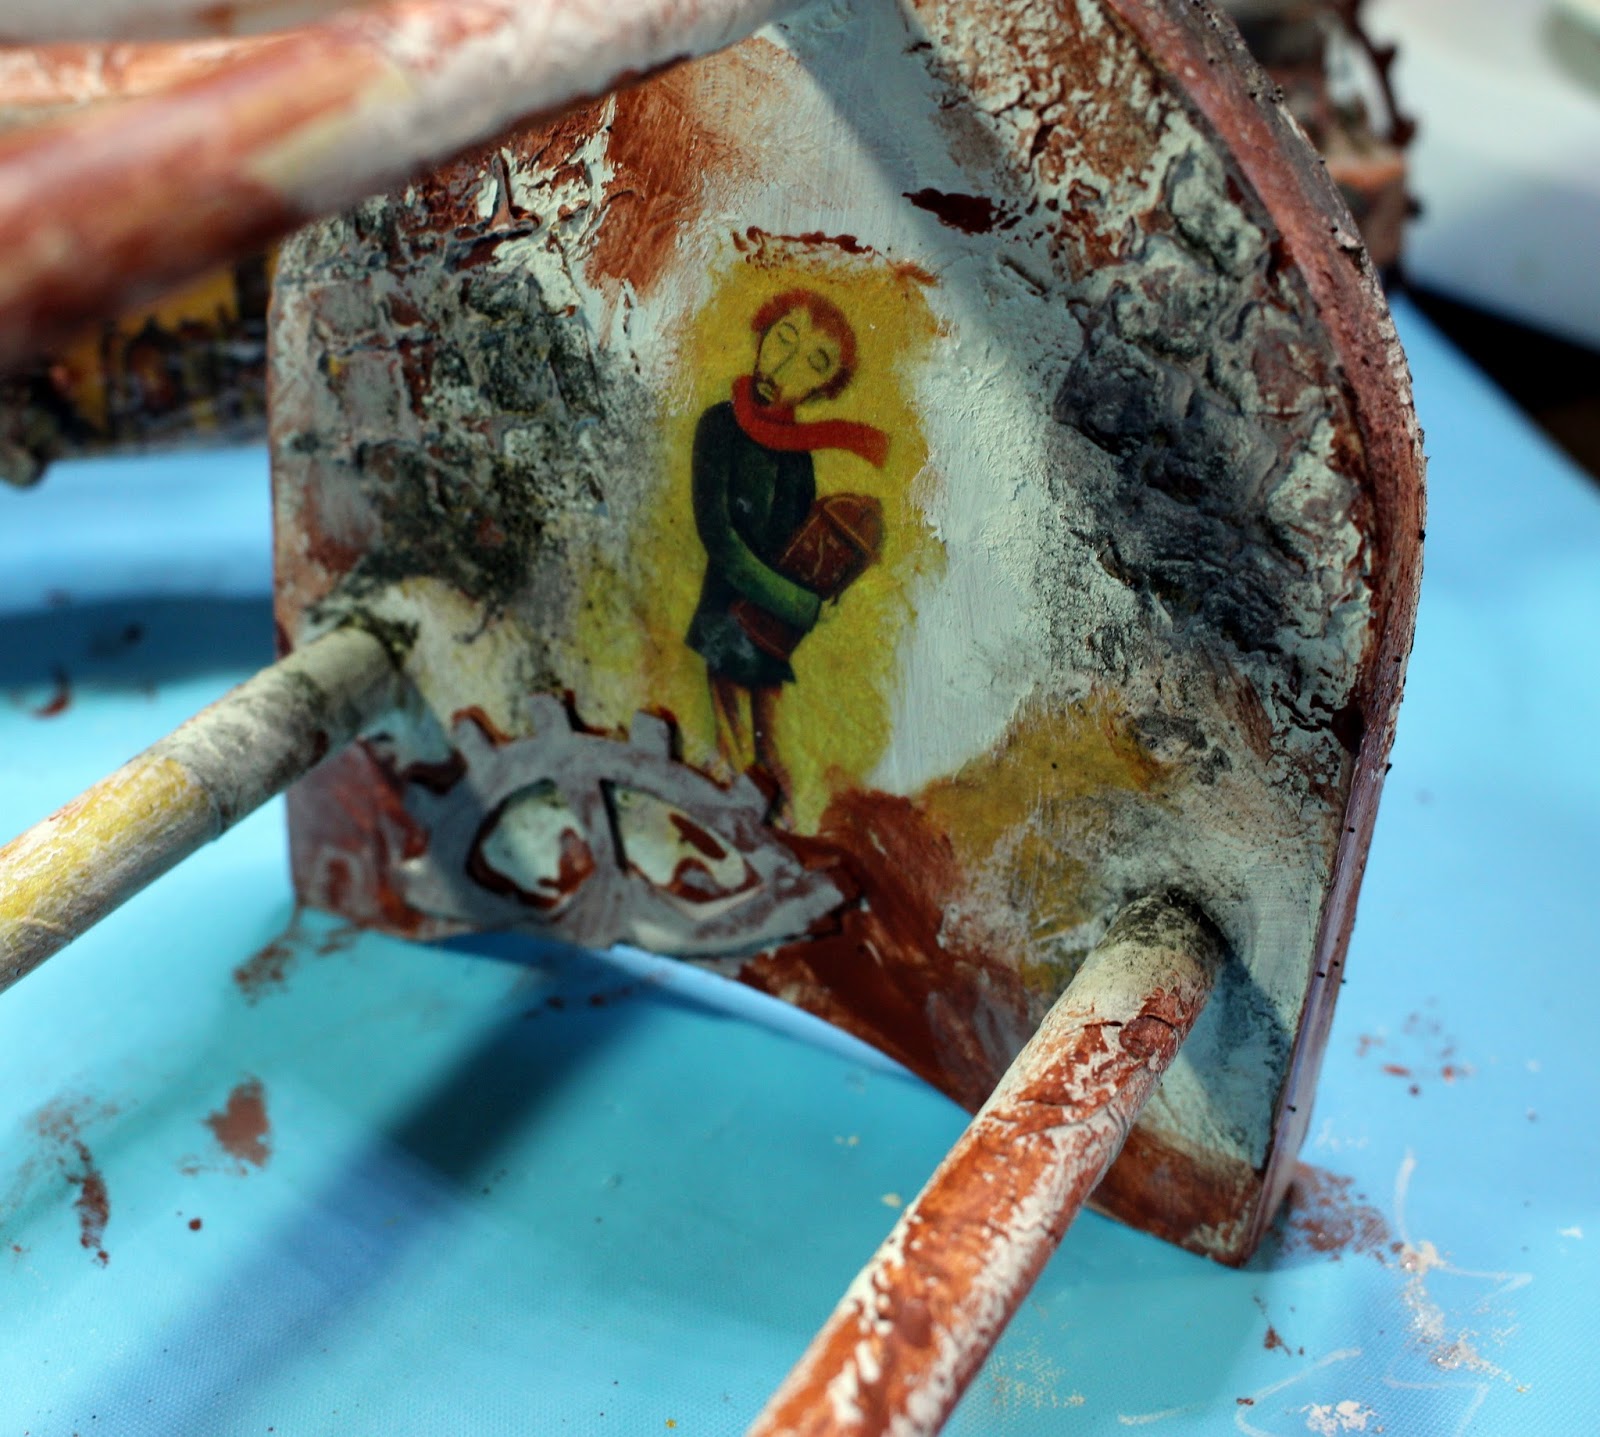
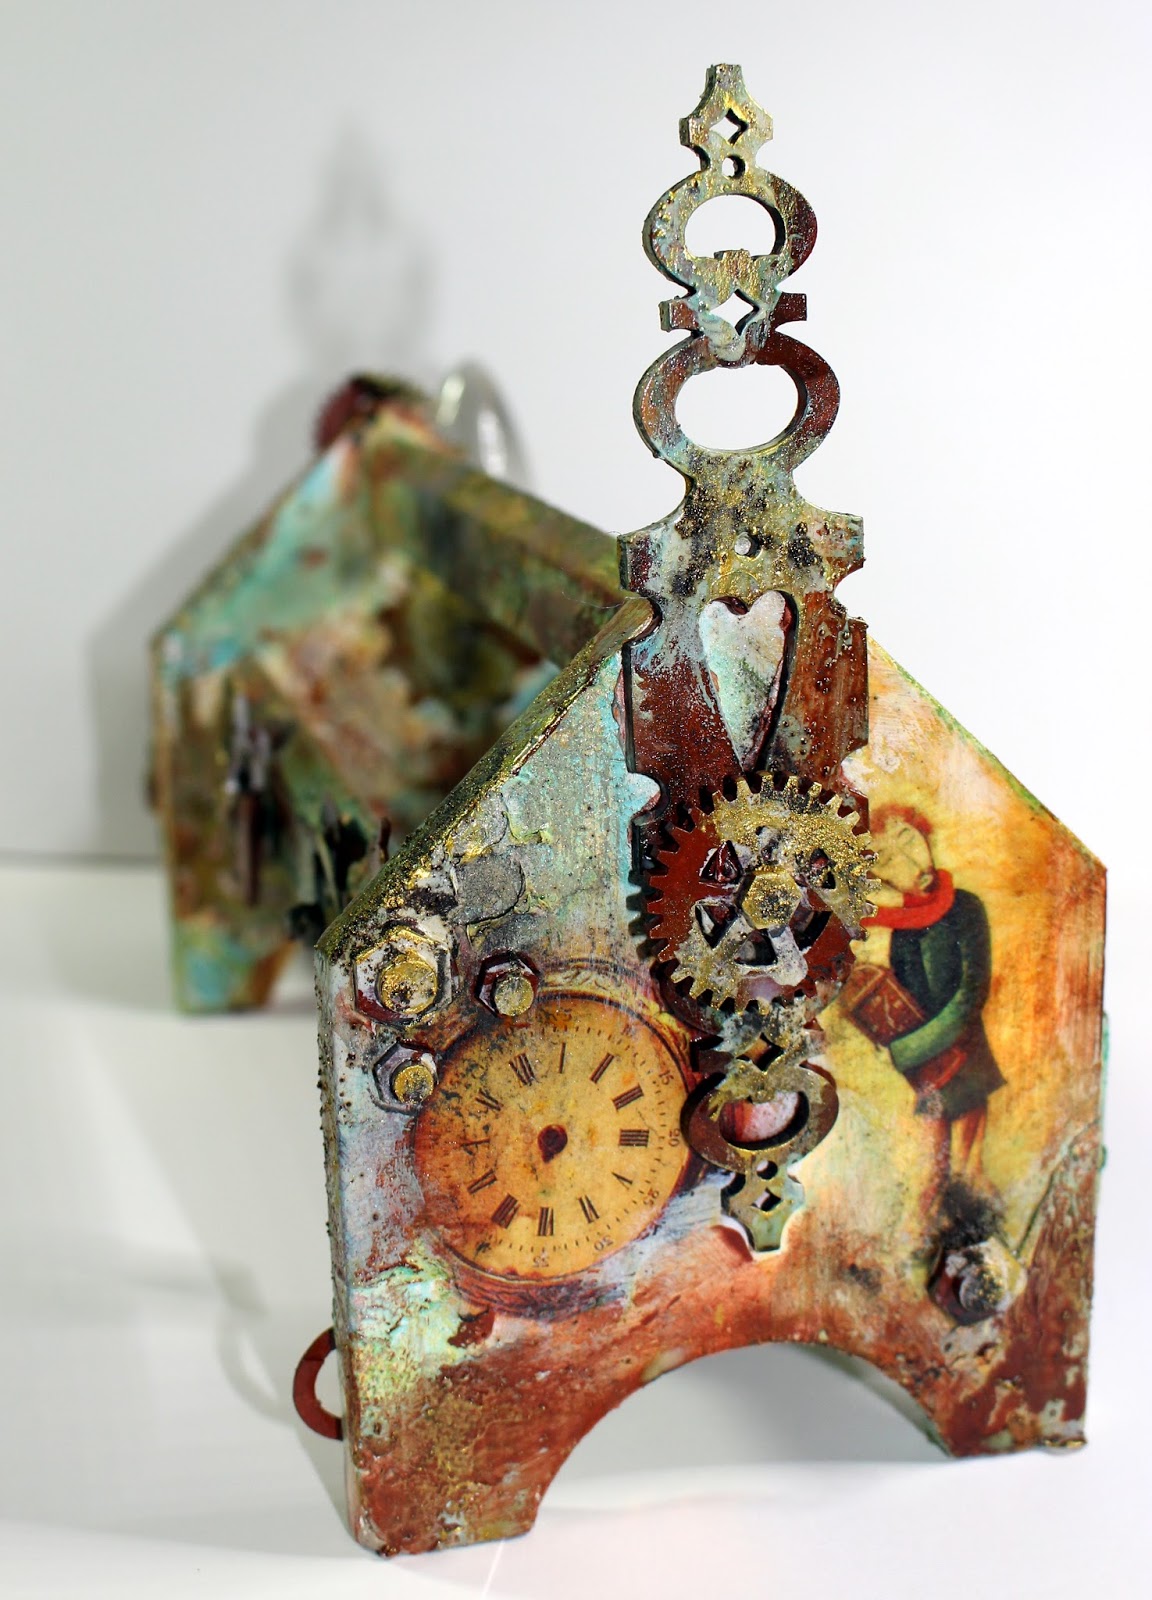
I started with a larger clock image on the other side. 
Die cuts and texture added plus a metal clock hand for dimension.

Finally finished with thicker embellishments and more dry brush work and gilding wax.
Love this character. 
Texture and layers built up. Waiting for the rust to develop. 
Building up the layers of transparent colour makes so much difference.
The second plier stand started off in the same way. 
At this stage you might feel like giving up. What a mess! 
Just keep going, adding layers of rust texture and colour.  
Just loving the gorgeous layers of texture and colour.
I used several layers of the die cut pipework together to make them thicker and stronger on this side. 
Wooohooo – this is soooooo yummy (or is it just me – tee hee).
Another end panel. 
I used an MDF keyplate (Powertex) to embellish this end. 
The final colouring makes such a difference.
The final side had a couple of little storage wells. I won’t really be using these so a perfect place to embellish with larger items. 
I had fun adding recycled light bulbs, screws and bits of chain etc. I used structure paste and Powertex treated kitchen paper as a 3D glue to hold things in place. 
Initially I had added a thinner die cut cog to the end but it wasn’t really strong enough. Here I added another thick greyboard cog over the first. Much more practical. I also added a small MDF Butterfly.

Here you can see more of the Steampunk treasures added. I also added some 3D Sand and Balls. 
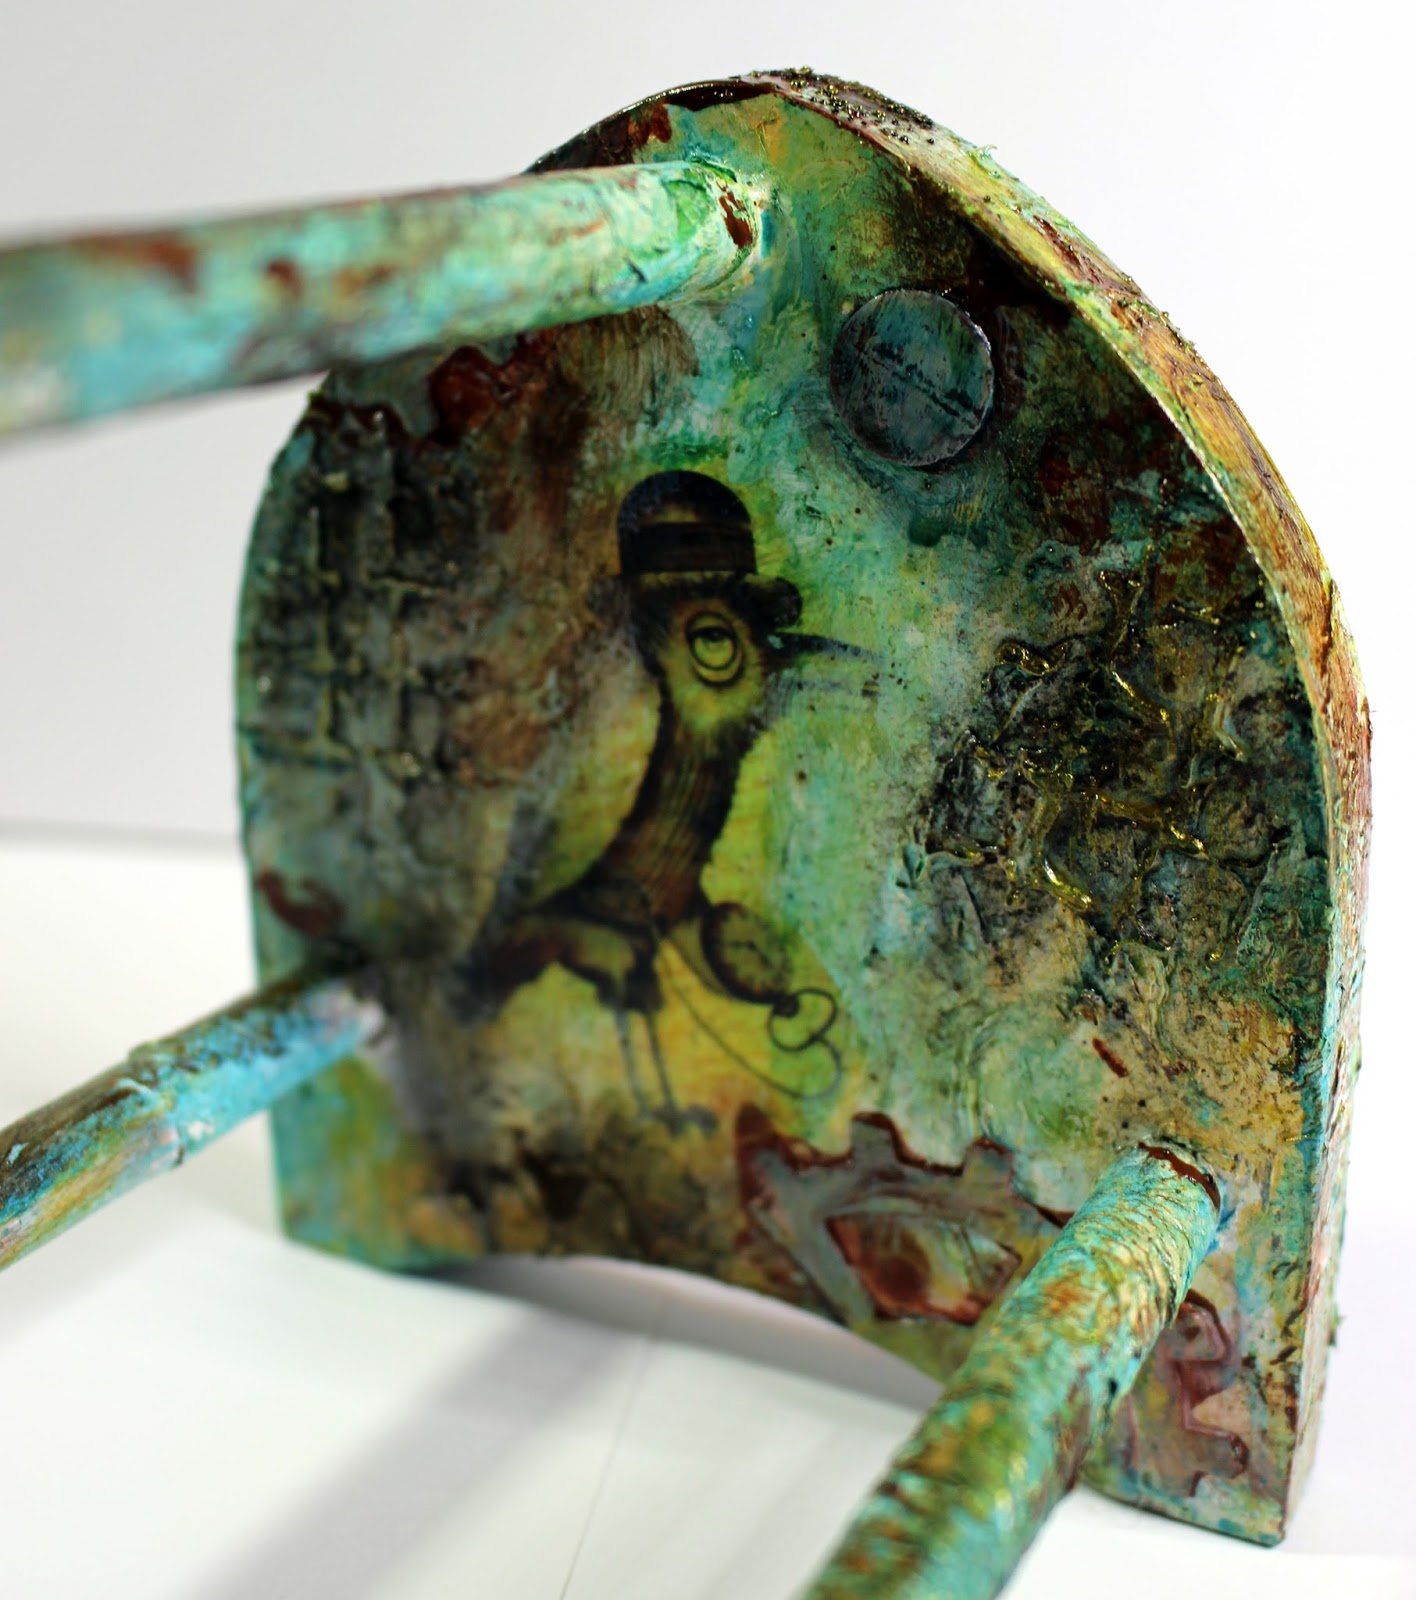
Love this Steampunk birdie peering out.
Well I hope that all these pictures have not overwhelmed you. I wanted to show how all the stages were built up. It also shows the stages that look awful, perhaps where a beginner might give up! Remember, if it all goes wrong just keep applying colour, inks or coloured varnishes. If this fails and you are really not happy – just paint over the whole thing with a base colour of Powertex and start again.
Hugs, Anne xxx.


Wednesday 27 June 2018

Floral Trinket Box created with Powertex

I have had a wire box frame in my stash for ages. Originally it had a woven straw covering that fell apart so I removed it with the intention of recovering it. It ended up as another ‘UFO’ (unfinished object) for years. I have finally dug it out and created this Powertex treated fabric box embellished with hand made fabric flowers. Now it’s a fabulous trinket box for storing some of my crafty treasures.
The bare wire frame is a strong construction – similar to the type of wire used to make coat hangers. It measures approx. 8 inches square across the top and 6 inches deep.
I used some recycled cotton bed sheets and treated them with Black Powertex to cover the box and lid. I lined the outer and inner panels to completely cover the wire frame. I gathered some cotton trims for the next stage; some crochet lace and a piece of gathered Broderie Anglaise.
I treated the crochet lace with Powertex and applied around the box base.
The gathered lace was applied around the lid. I also dug out some greyboard lazer cut foliage shapes to embellish the top. These were coated and stuck down with Powertex. When dry I started dry brushing over the surface using Easy Varnish and Silver Colotricx. Extra colour was applied to the foliage to make it stand out from the dry brushed background.
Here you can see the dry brushed lid next to the unpainted base. The dry brushing has emphasised the texture and added metallic highlights.
Next I made some fabric roses from 25mm and 15mm strips cut from recycled bedding. These were created using Ribbon Ruching Flower Combs from Gina B-Silkworks. Basically strips are marked out using the Flower Comb templates, a running stitch is sewn along the marked lines and the stitching is pulled up to gather and shape into a rose. I prepared my strips and treated with Powertex before pulling up the stitching. The Powertex holds and glues the gathering in place. I left the flowers to dry before adding to the box top.
To create the roses I followed instructions detailed in Gina’s new Ribbonwork Flowers Book: Twist Roses from 25mm cotton strips using comb 3a (Rococo Comb Set) and 1930’s Roses from 15mm strips using comb 13a (Venezia Comb Set).
I used one of my dies to cut a frame for the centre (Sizzix), applied to the top and finished in the same way as the greyboard foliage.
The flowers were dry brushed with Easy Varnish and Interference Lilac Pigment. Loving these new Pearl Pigment colours! Powertex was then used to glue down the roses to the centre. I added some ready made flower stamens around the group (purple), and some small ready made satin ribbon roses to the corners (Powertex treated and coloured).
Next I mixed some 3D Sand and Balls into Black Powertex and drizzled the mix around the flowers. A few untreated balls were also dropped into the wet Powertex. The untreated balls kept their original colour on the surface giving contrast with the black base. Once dry I coloured by brushing over the surface using Easy Varnish and Mojito Lime Pigment.
I also dry brushed a little of the Lilac pigment sparingly over the lace trims and used to colour some hand made air dry clay embellishments (created using a silicone mould from my stash) added to the box corners.
I used one of my large rubber stamps (lace design from Heartfelt Creations) to stamp some extra textural interest around the sides using Viola Metallic Acrylic Ink. Note: the fabric surface is already quite textured and not very flat so the stamping does not give a clear impression of the design but just adds a little more depth and interest to the surface.
I hope that you like my new treasure box.
Hugs, Anne xxx.


Thursday 21 June 2018

All about feathers, cards created with stamps from Chocolate Baroque


Good morning. Today I am sharing a few cards created with the ‘I Shall Be Your Wings’ stamp set from Chocolate Baroque.
My first is a colourful bunch of feathers in a shabby chic style.
I first stamped the feathers onto copy paper and cut them out to create masks. A few dots of Zig 2-way glue were applied to the back to hold the masks in place. This glue gives a temporary tac if left to fully dry before sticking down. Alternatively this could be done using the special Masking Tissue which comes with a tacky back. These masks can then be kept and re-used multiple times.
The feathers were stamped with multi-coloured dye based ink, layering images with masks and working from foreground to background. The sentiment was stamped with Versafine (Vintage Sepia). A drop shadow was added around the feathers using pale watercolour pen ink applied with a brush (to add more 3D depth).
Kraft card and the stamped panel were trimmed to fit an A5 card blank. The craft card was distressed using the edge of scissors, the stamped panel edged with alcohol marker to frame. A little Stickles (Crystal) was added for sparkle.


My second is a 6X6 inch card embellished with 3D shaped cut out feathers.

Faux stitching was added around the edge of the card, and small dots drawn, using a fine tipped opaque white pen.

The feathers were stamped onto a slightly paler version of Kraft card using Versamark and sparkly aqua embossing powder (WOW Calypso). These were then cut out and lightly shaped with a ball tool before gluing to the card front with 3D glue gel. Finished with a ribbon bow.
My third is another 6 X 6 inch card using a lovely background paper from Crafty Individuals (Shades of Summer). This particular pad is usually available on the Chocolate Baroque website (but depends on stock).
The paper was glued to a card blank and faux stitching added around the edge using a fine tipped pen. The sentiment was stamped with Versafine (Vintage Sepia). A little watercolour pen was painted over the image to help at more ‘weight’ to the base.
The feathers were stamped onto Kraft card using Versamark and sparkly aqua embossing powder (WOW Calypso), cut out and lightly shaped before sticking over a die cut birdy (Tattered Lace die) using 3D glue gel. Eye and leg details were added with fine tipped pen. A little clear sparkle pen was brushed over the bird for extra shimmer.


Saturday 16 June 2018

Quick and Easy cards created with stamps from Chocolate Baroque


Good morning. Today I am sharing three quick and easy makes using stamps from Chocolate Baroque. These are great for batch making or for creating something in a hurry.
For my first make I used the Square Bubbles background stamp and I Shall Be Your Wings stamp set.
A black card blank (15 X 13cm) was stamped with Versamark and heat embossed with white powder. The feather was embossed with aqua glitter powder onto white card, and the sentiment with white powder. The card was sprayed with water and colours dropped on (sparkle pens) and blown around by puffing through a straw. Finished with a few sparkly sequins.
My second quick make was created using the Square Bubbles background and Rose Duo stamp set along with a sentiment from I shall Be Your Wings. I used dies to cut a fancy card blank and layers in black and watercolour card.
The card blank background and sentiment were stamped with Versafine (Onyx Black). The foliage was then stamped using a multi-coloured dye based inkpad. Spritzing with water spread and softened the prints. A black alcohol marker was used to edge the card.
A strip of copy paper was then placed across the sentiment (acting as a mask) and images stamped again with Versafine, repeating the stamping without re-inking to create depth. I added a tiny die cut bird to finish the scene.

I again used the Square Bubbles background stamp and Rose Duo set to create a pretty floral card.
The image was stamped with Versafine onto watercolour card and very quickly coloured with watercolour pens. A little colour was added directly to the darker areas and colour dragged out using a damp brush to give quick shading.
I then covered my image and stamped the background with pale ink. I had already stamped the image onto copy paper and cut out to create a mask. You could also use special Masking Tissue, which has a tacky temporary adhesive back, to create masks. I often do this with a new stamp set keeping the masks in my stash for future use (I re-use these masks multiple times). If you don’t have masks prepared then obviously you will need a little more than 15 mins to make this one. Alternatively just randomly stamp around the background avoiding the floral image. I finished by edging with alcohol marker and faux stitching using a fine tipped pen before gluing to the card blank.

Wednesday 6 June 2018

Simple Feather Jewellery created with stamps from Chocolate Baroque


Good morning. Today I am sharing a couple of jewellery pieces created with the ‘I Shall Be Your Wings’ stamp set from Chocolate Baroque.
My first project is a pair of sparkly feather earrings and presentation card.

Materials
  • I Shall Be Your Wings stamp set
  • Decorative card blank approx. 16 X 11cm (white inkable card)
  • Inkpads: Archival (Jet Black) and dye based multi-coloured (Kaleidoscope Caribbean Sea)
  • Stickles (Crystal) and cerise pink glitter glue (Pinflair - suitable for multi surfaces)
  • Alcohol ink pen (pale pink)
  • Organza ribbon and ready-made ribbon rose (pink)
  • Set of silver plated earring hooks and fine cord end crimps
  • Angelina Fibre mix (greens and blues) and Angelina Film
  • Faux gems (green) and Gemtac glue
  • Domestic or craft iron (warm setting) and baking parchment
  • Jewellery making pliers (flat or snipe nosed)
Making the presentation card
  1. The card blank was coloured by blending multi-coloured ink in from the edges with a sponge. The surface was then lightly spritzed with water and blotted with tissue to create texture.
  2. The feathers were then stamped with rainbow ink and the sentiment with Archival. A little clear glitter glue was added for sparkle. The sentiment was coloured with alcohol ink pen.
  3. Two small holes were punched to hold earrings. Finished with ribbon and fabric rose.

Making the Earrings
  1. The feather stamp was inked with Archival ink. A sandwich of Angelina Film and Fibres (2 sheets of film with fibre between) was laid onto the inked stamp. This was covered with a sheet of baking parchment and a warm iron was pressed down onto the sandwich to fuse. When cool the fused sparkly sheet was peeled away from the stamp surface and the feathers cut out.
  2. Small crimps were used to attach the feathers to earring hooks.
  3. Faux gems were glued in place with Gemtac glue (formulated for sticking gems or beads to fabrics) and extra sparkle added with cerise glitter glue.


My second project is a pretty feather pendant on a long chain.

Materials
  • I Shall Be Your Wings stamp set
  • Semi translucent shrink plastic
  • Archival Inkpad (Jet Black)
  • Alcohol markers (green and pink)
  • Pebeo Gilding Wax (Silver)
  • Heat gun and non-stick mat
  • Recycled necklace chain and Celtic pendant dropper (from my stash)
  • Silver plated jump rings
  • Jewellery making pliers (flat or snipe nosed)
Making the feather pendant
  1. The feathers were stamped onto shrink plastic with Archival Ink and cut out. A small hole was punched into the tops for hanging. The backs were coloured with alcohol ink pens.
  2. The feathers were then shrunk using a heat gun.
  3. The colouring on the feather backs looked a bit messy. Being a longer pendant the back is likely to show so I coated the backs with silver gilding wax to finish.
  4. The feathers were then added to the decorative pendant dropper using jump rings and the pendant hung on a long chain.

I really enjoyed making these simple jewellery pieces. Happy stamping, Anne x.