Tuesday, 7 March 2017

Tiered Maxi Skirt made from a recycled bed sheet


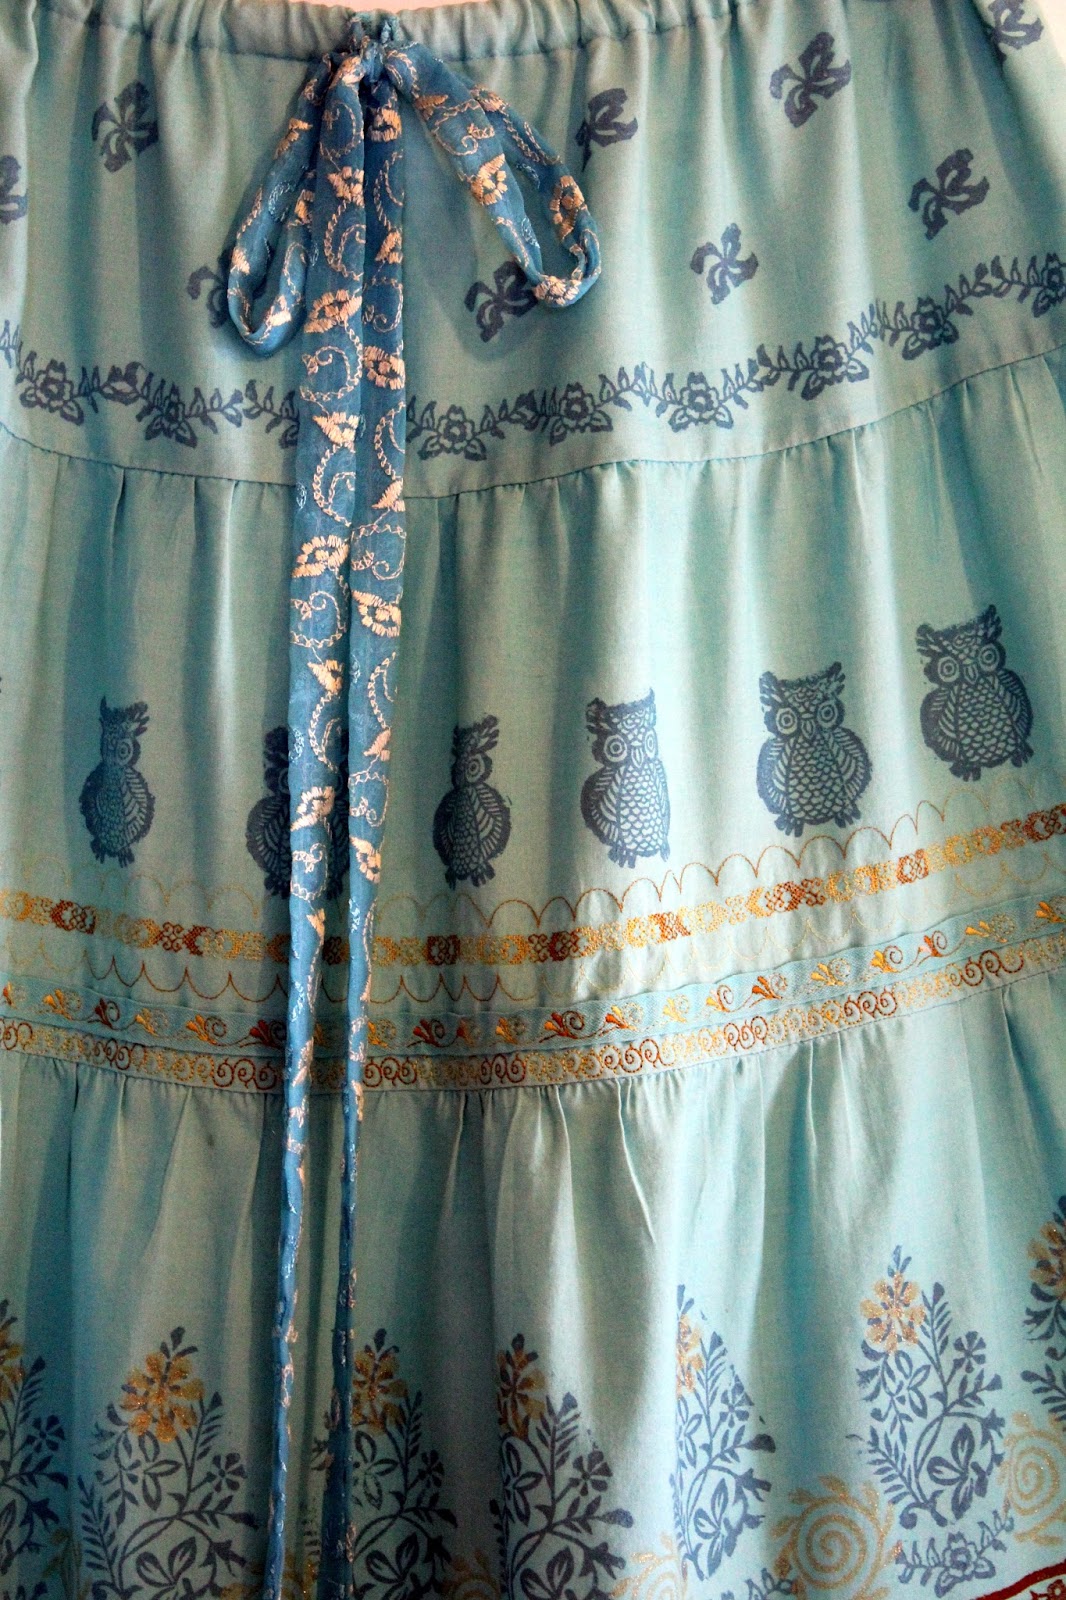
Good afternoon. I am sharing a skirt that I made from an old double bed white sheet. I dyed the background and made up this simple tiered skirt. I simply measured my hips and cut the width of the top tier so that I could pull it on easily with an elasticated top band. I then added tiers of increasing width (approx. 1.5 to 2X the width of the previous tier). I used a remnant of embroidered fabric for the bottom frill.

Before adding the elastic to the waist I machine embroidered rows of decorative stitching and flourishes. I then block printed with various designs and heat set to make permanent. Summer here we come.

Materials:

White cotton double bed sheet, cotton ribbon for trim (dyed with sheet) and remnant of turquoise embroidered chiffon

Dylon multipurpose dye. This is now discontinued but they have a new formulation that is equivalent for use on natural fabrics (dyed in washing machine).

Madiera Rayon embroidery thread – variegated golds and browns

Wooden printing blocks:

Owl (Blockwallah), small leaves, floral sprig, daisy flower, leafy spiral (Colouricious), paisley and floral Border (unknown brand)

High density foam mat - to lay underneath as block print (Colouricious)

Fabric paints - heat set with iron (to make permanent):

White Gold Starlights Fabric Paint (Imagination Crafts), Chestnut Brown Multipurpose Satin Paint (Martha Stewart), Turquoise blue mixed to match fabric – Opaque White (Jacquard), Metallic Turquoise and Blue (Vallejo from Colouricious)

Friday, 3 March 2017

Butterfly Stepper Card created for Chocolate Baroque


Good morning. Today I am sharing another of my show samples using the Breath of Spring stamp set from Chocolate Baroque. The butterfly swirl can be used to make lovely backgrounds but it also works well as the main decorative feature. I used sparkly black embossing powder for added dimension (a bit difficult to see in the pic). I stamped and cut out extra butterflies and used them to embellish this stepper card, along with some die cut swirls and paper punched flowers. I also used a pretty background paper from Crafty Individuals (6 X 6 inch pad – Springtime). Victorian Velvet Distress Ink was used on the card blank and edges.
I cannot wait for more shows coming at the end of the month. Lesley will be bringing us something a little different. My lips are sealed – tee hee x.

Materials:

Monday, 27 February 2017

Spring Bird Heart Pendant created for Chocolate Baroque


Good morning. Today I am sharing one of my TV show samples using the Spring Birds Daffodil stamp set from Chocolate Baroque. This was done in rather a rush to catch the post so I just upcycled an old sparkly floral pendant and chain to finish. However, it does mean that this is a really easy project for beginners to make. No specialist tools or jewellery making techniques are required.
I am thinking of making another version with a more elaborate necklace ‘chain’ – perhaps a beaded spiral rope in colours to co-ordinate? I will share when finished.
 
Materials:
  • Spring Bird Daffodil stamp set
  • MDF heart approx. 6cm X 9cm (at widest points)
  • Pebeo acrylic paint (black) and gilding wax (gold)
  • Versamark inkpad
  • WOW embossing powder (Gold Rich)
  • Starlight Paints (Aegean, Cyclamen)
  • Small sparkly pendant and chain (upcycled)
 
How it was made:
  1. The pendant was painted with black acrylic and left to dry.
  2. The bird branch was stamped, embossed with gold powder and coloured with Starlight paints. I edged the pendant with gilding wax to finish.
  3. I used a Crop-a-dile punch to create a hole and looped the chain through. I secured the little floral pendant with a little 3D glue to cover the hole.

Wednesday, 22 February 2017

Butterfly Shrine card created for Chocolate Baroque Colour Challenge 32


Here is another project that I created for the Chocolate Baroque Colour Challenge 32 this month.

I came up with this after playing with my Inkadinkadoo stamping gear (circular wheel) and the Sticks & Stones stamp set to create wreath. Similar can be achieved by drawing a circle and dividing it into 8 sections. Keeping the stamp orientation steady, stamp and turn the card between each stamping or just work more freely around a circle.

I hope that you like it, and I look forward to seeing your entries x.

Materials:

 
How it was made:
  1. The top corners of the card blank were rounded off using a punch. The bottom strip was cut from blue card. The sentiment was stamped with Versamark ink and embossed with copper powder. The strip was then edged with gilding wax before gluing to the card base.
  2. An A5 sheet of stamping card was spritzed with blue & green inks and stamped with Silhouette Grasses. The top edge was cut using the decorative trim die. The top and edges were rubbed over with gilding wax. A circular mat was cut from blue card and placed behind the decorative central motif. The background was then glued to the card front.
  3. Another piece of stamping card was lightly spritzed with blue ink. The wreath was then stamped with Distress Ink using the stamping gear. The wreath was cut out with the circle die and gilding wax rubbed over the decorative edge. This was mounted to the card front with 3D foam pads.
  4. The butterfly was stamped (Just Butterflies set), embossed with copper powder and coloured with sparkle pens. I cut then cut out and shaped for added dimension. The ribbon and butterfly were then glued to the card front.
  5. I finished with copper PVA pearls and glitter glue on the wreath, blue PVA pearls along the base strip.


Monday, 20 February 2017

Kingfisher Scene Cards created for Chocolate Baroque


Good afternoon. Today I am sharing another couple of my TV show samples for Lesley Wharton and Chocolate Baroque using the Kingfisher Song and scene building stamp sets recently featured on Hochanda. The aperture ‘waste’ from one card was used to create the background scene on the other.
Materials:
  • Kingfisher Song, Sticks & Stones, Baroque Meadow, Silhouette Grasses, Words to Dazzle and Sparkle stamp sets
  • 15 X 18cm card blank (Kraft card), 18 X 20cm card blank (white), card for background mat & layers (white), white stamping card (Sheena Douglass), waste copy paper (for masks), scrap card (brown and green for foliage die cuts)
  • Inkpads: Versafine (Black Onyx), Memento (Tuxedo Black), Distress Ink (Victorian Velvet)
  • Ink sprays: Lindy’s Stamp Gang (Cocklebells Coral, Opal Sea Oats, Azure Sea Asters)
  • Spectrum Aqua watercolour pens (pinks, greens, browns)
  • Spectrum Noir Sparkle pens (clear, gold, pink, green, and turquoise)
  • Cosmic Shimmer PVA pearls (Olympic Gold)
  • Fine tipped pen (brown) and Spectrum Noir alcohol pen (brown)
  • Soft Form Relief Paste (Gold and Silver)
  • Starlight Metallic Paints (turquoise, pink, gold)
  • Rectangle dies approx. 9.5 X 12cm and 6.5 X 3.5 cm (Heartfelt Creations Cut Mat Create set), dies to cut rectangular frame (Tattered Lace Rectangle Accordion), dies to cut twigs (Sheena Douglass) and ferns (Tattered Lace Floral Layers Leaves 1)
Creating the Kingfisher embellishments:

The twigs and ferns were cut from coloured card and further coloured with watercolour pens (to give them more dimensional colour).
The cut out card kingfisher was stamped with Versafine and coloured with watercolour and sparkle pens. The kingfisher scene stamp was used for this, the rest of the scene being cut away and discarded.
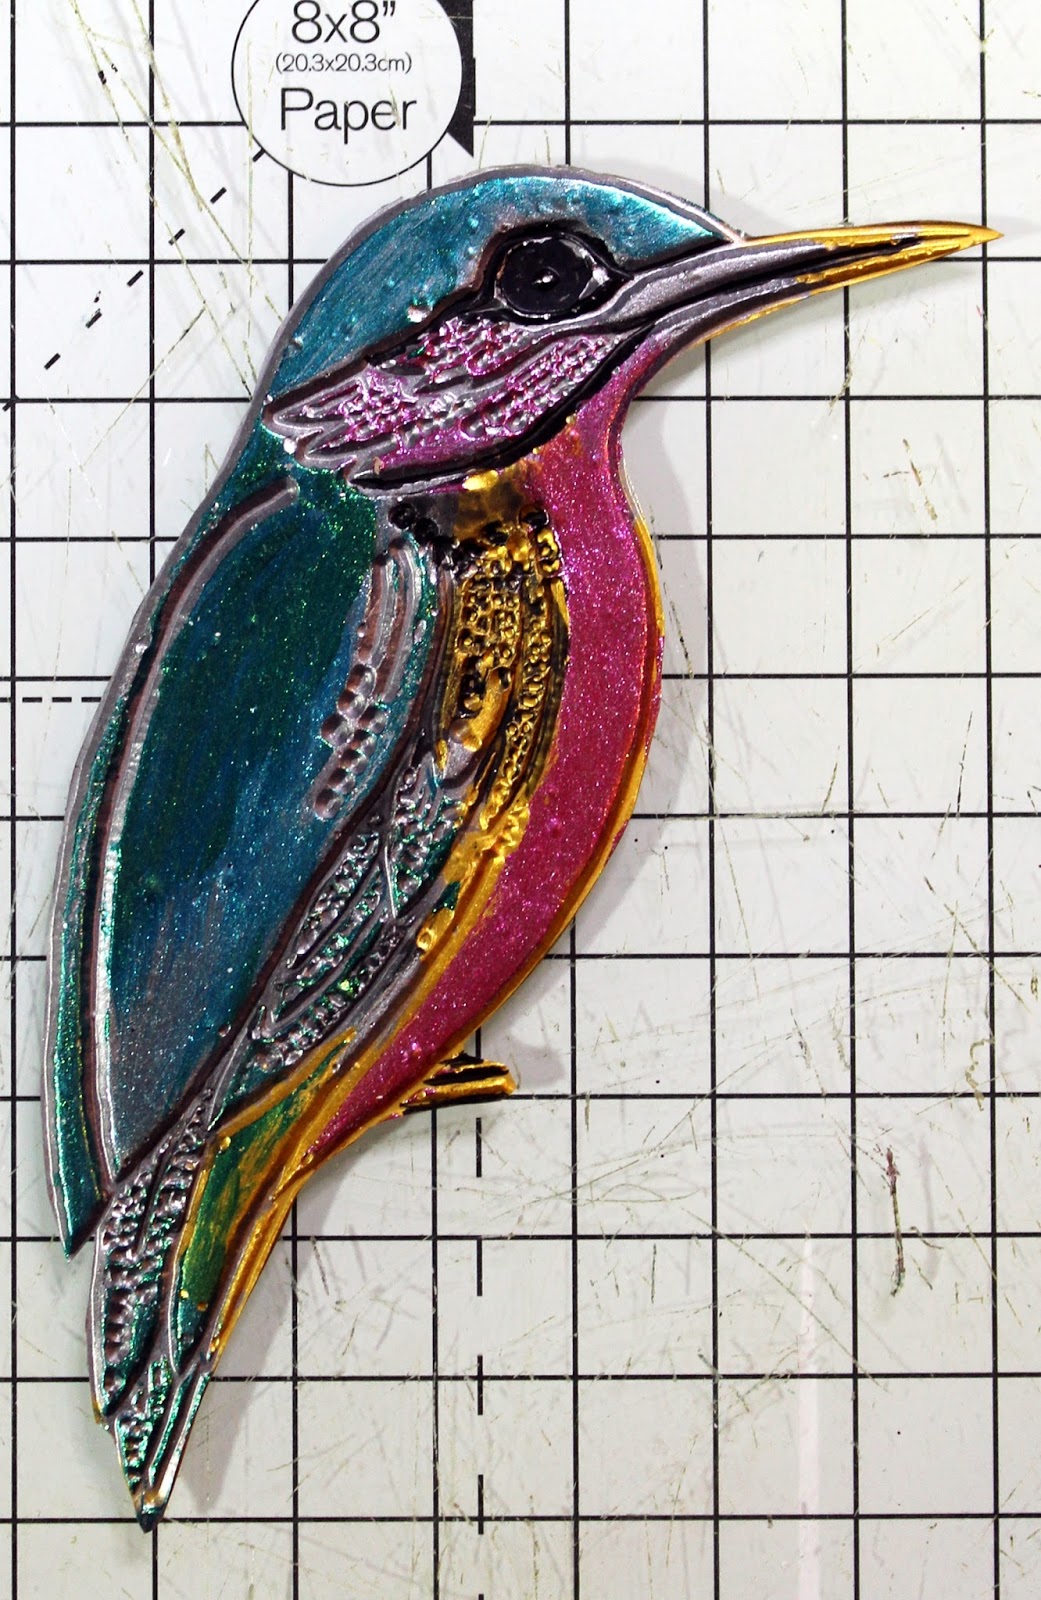
The larger dimensional kingfisher was created by spreading gold and silver Soft Form Relief Paste over the stamp. This was left to dry overnight before peeling off the stamp. Rough edges were trimmed away and further colour added using the Starlight Paints (leaving some areas of gold and silver paste showing through).
Creating the Kraft card blank:
The frame and central background mat were cut from white card using the Accordion die (largest die). This creates an attached mat which was snipped away from the outer frame. Faux stitching was added with a fine pen using the pin holes as a guide. These were then glued to the Kraft card blank (finished size approx. 15 X 18cm). If you don’t have this die you could easily use other rectangle dies to produce similar.
Creating the background scene and scenic frame:

An A4 sheet of stamping card was spritzed with inks, spraying blues nearer the top and golds at the base. The sheet was trimmed to slightly under 18 X 20cm and a sentiment mat cut from the excess (6.5 X 3.5cm).
Grasses and butterflies were stamped along the bottom edge using a mix of watercolour pens. Tip: Brush the colours directly onto the stamp then ‘huff’ onto the stamp before stamping. Moisture in your breath reactivates any partially dried watercolour.
The aperture was cut with the rectangle die (approx. 9.5 X 12cm). Edges were inked with Distress Ink.

Finishing the simple kingfisher card:
Additional ferns were stamped in dark green along the base. Finished by gluing the scenic mat, kingfisher, branch and fern embellishments to the card front with 3D glue for added dimension.

Creating the scene for the frame aperture:
Stamping card (larger than the aperture 9.5 X 12cm) was spritzed with inks in the same way as the other scene backgrounds.
The scene was built up working from the foreground base upward, stamping with Memento (waterproof when dry).
Scene components were stamped onto copy paper and cut out to create masks. These were simply laid in place, covering the appropriate stamped images,  before stamping the next scene layer. Tip: To stop masks moving while stamping you could use a couple of dots of zig 2 way glue on the back of the masks. Leave it to completely dry clear before placing the masks (the glue goes on blue and dries clear). This then acts as a temporary adhesive to hold the masks in place.
I continued building up the scene using masks where needed.
The scene was trimmed down to fit behind the aperture and coloured with watercolour pens. Silhouette grasses were stamped in the foreground with Versafine. The sentiment was stamped onto the sentiment plate.


Sunday, 19 February 2017

Blue and White Crocus card created for Chocolate Baroque


Good morning. Today I am sharing one of my samples with the new stamps from Chocolate Baroque recently featured on the shows with Lesley Wharton on Hochanda.

Materials:
How to make it:
  1. Cut the frame and square mats for layering. Edge with Distress ink and add faux stitching with the fine tipped pen.
  2. Stamp the image and sentiment with Distress Ink. Pull out the colour using a damp brush. Add some ink to a craft mat and use as a paint to add extra colour and shading. Use the white gel pen to add back some highlights if needed.
  3. Mat and layer onto the card front using 3D foam on the topper for extra depth.

Friday, 17 February 2017

A couple of quick and easy cards created for Chocolate Baroque

Good morning. Today I have a couple of quick and easy makes using the Baroque Meadow stamp from Chocolate Baroque. There is more inspiration and quick makes from my Teamies on the CB Blog.
 

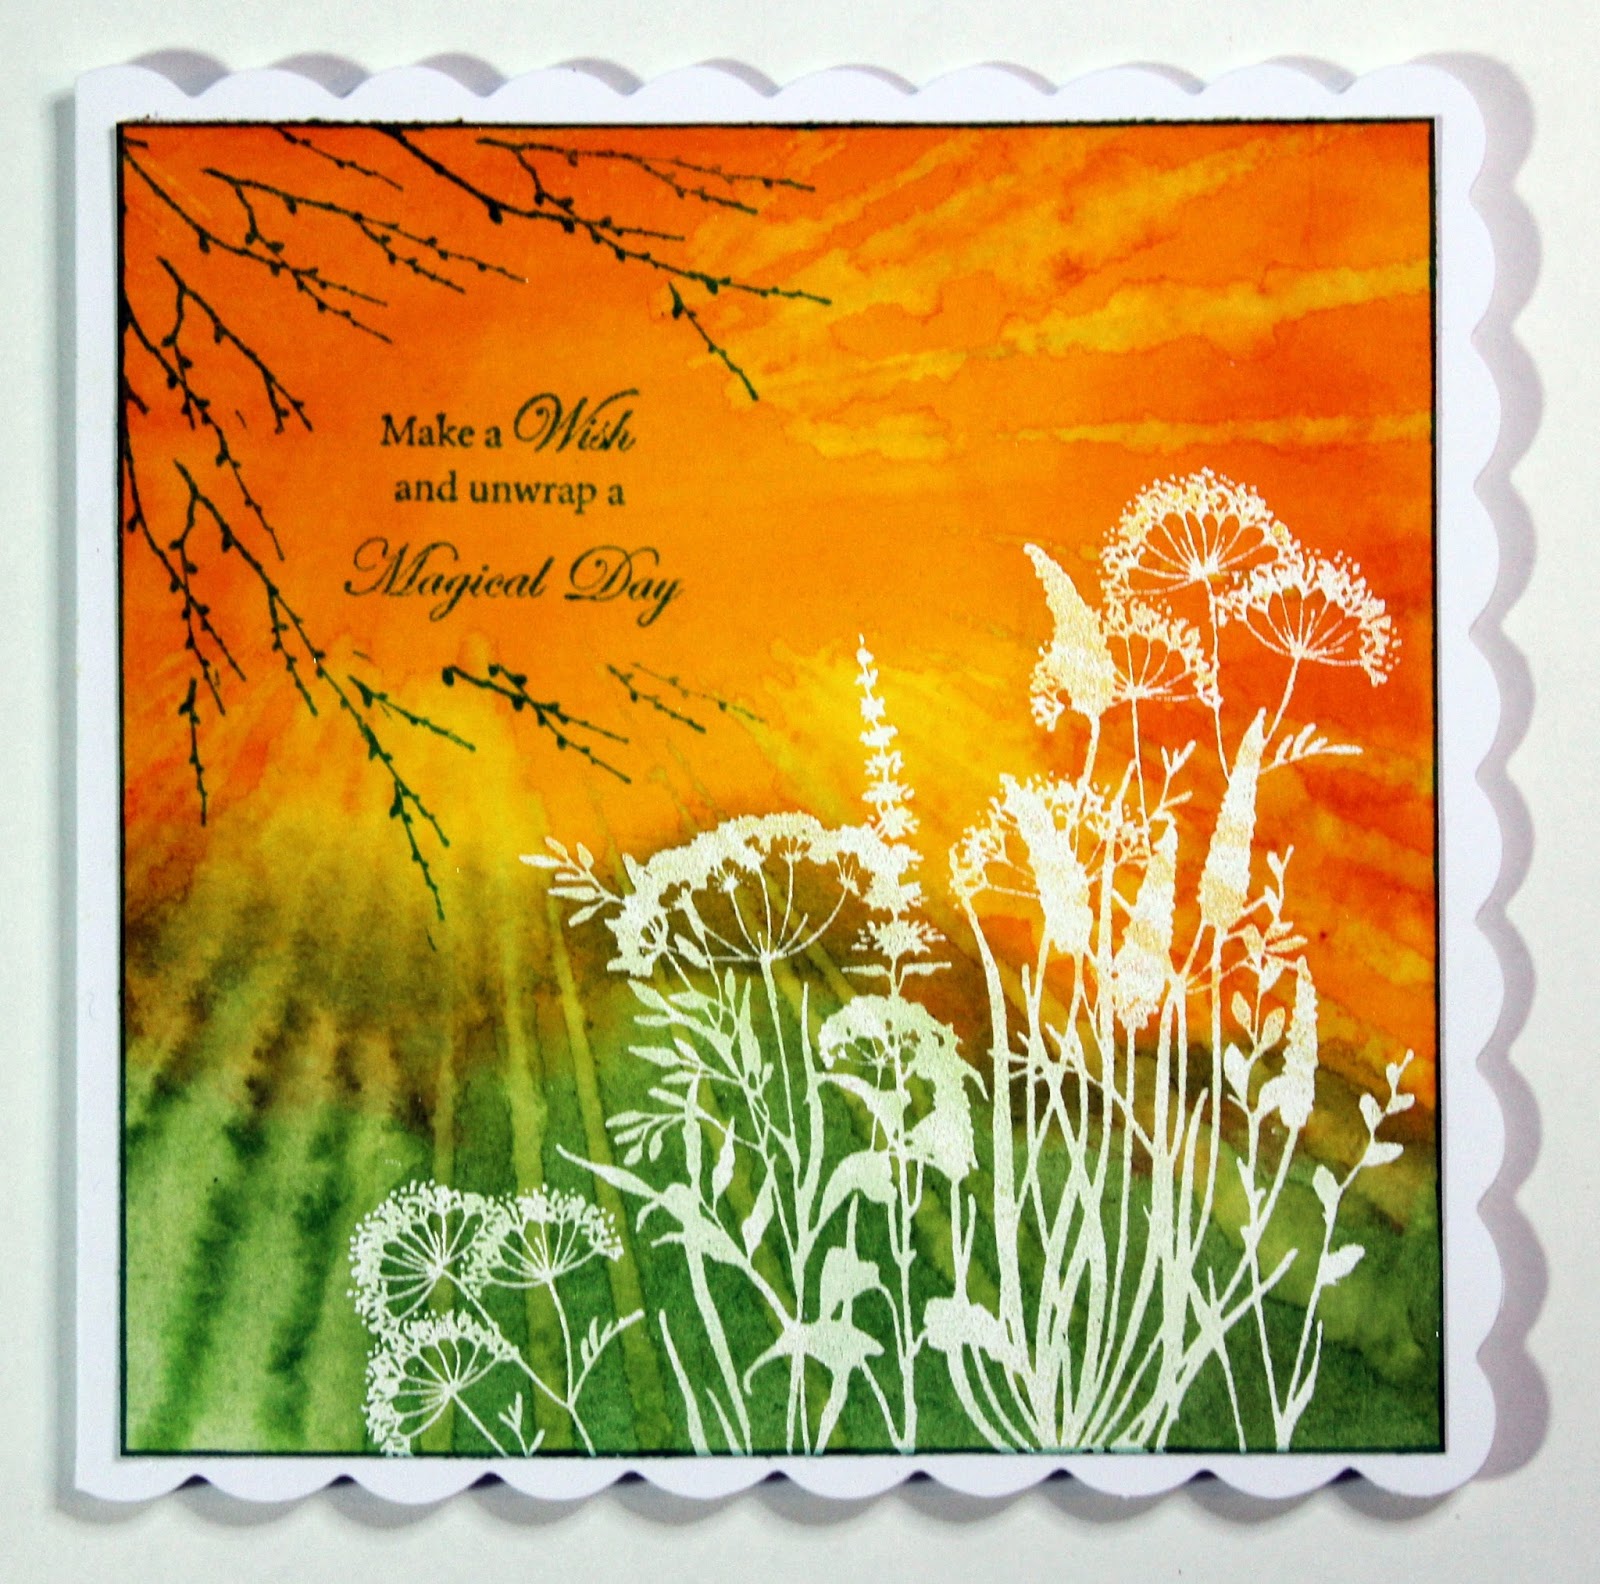
I stamped the foliage with Versamark Ink and embossed with white powder. The background was then coloured with inks. The sunray stencil was laid on top and I gently sponged with water and blotted to remove some of the colour. Finished by stamping the sentiment and twig. I used green pen to edge the card and frame.


The images were stamped onto a tag with Distress Ink - so quick and easy with the beautiful Baroque Meadow stamp. The card was edged with black pen and a little Distress Ink to frame.
 
 
Materials (Magical Day):
 
Materials (Missing You):