Materials:
- Seadragon, Mermaid Queen, Underwater Kingdom, Underwater and Seashell Collage stamp sets
- White stamping card, teal green glitter card
- 20cm square canvas board
- White Gesso
- Acrylic paints (blues, greens and teal metallic)
- Viva Décor Croco Crackling Colour (green shimmer -501)
- Viva Décor Precious Metal Colour (pink)
- Alcohol pens – for colouring die cuts (greens)
- Watercolour pencils (pinks, purples, blues, greens, yellow, orange)
- Versamark Inkpads (Vintage Sepia and Onyx Black)
- Archival inkpad (dark blue)
- Watercolour or acrylic transparent shimmer paints (blue, green – for dragon)
- Recycled jewellery pieces (chains, pearls etc.)
- PVA pearls
- Iridescent glitter glue (pink)
- 3D glue gel
- Dies to cut seaweed - mixed branches (Heartfelt Creations) and leaves (Couture)
- Stencils with swirls or water patterns (optional)
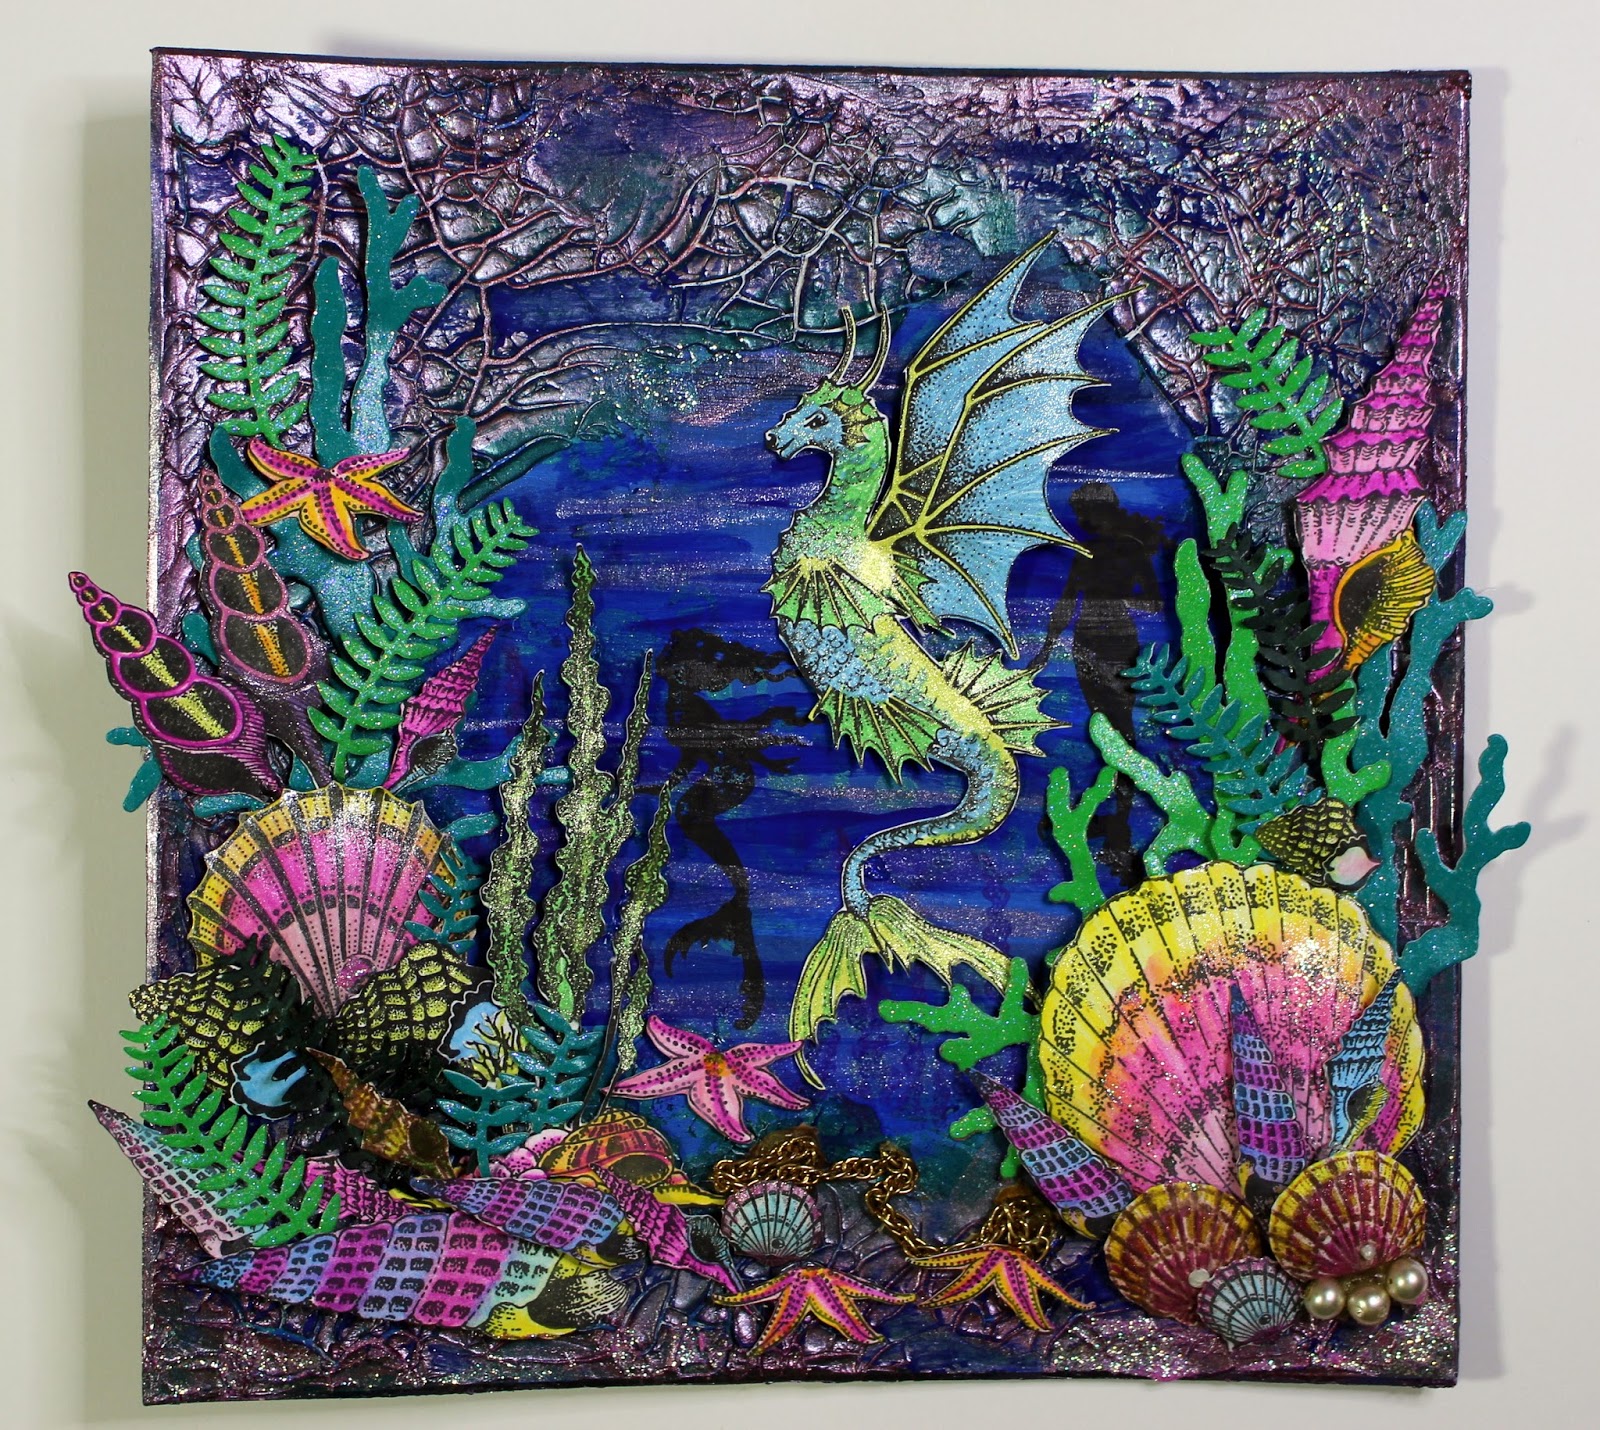
- Add a coat of white gesso to the canvas. Note: The canvas was already primed but I find that the gesso adds a bit more of a key for adhering acrylic gels etc.
- Paint the background with streaks of blue and green acrylics. Add some texture with stencils (if you like).
- Stamp some of the weeds etc. with dark blue ink. Stamp the mermaid silhouettes in black ink.
- Apply the crackle paste all around the edges using a palette knife and leave to dry overnight. Rub over the crackle texture with some pink metallic paint. Add some sparkly streaks into the water. Rub a little teal metallic in some areas.
- Die cut a range of seaweed shapes using dies from plain card (colour with pens) and teal glitter card.
- Stamp the dragon, seaweed, shells and starfish onto white stamping card using black ink, and brown ink for some of the shells. Colour with watercolour pencils and a damp brush. Add some shimmer paint to the dragon. Cut out and shape slightly to give them dimension.
- Glue on the die cuts and stamped images using 3D glue gel. Add some ‘treasure’ – chain, pearls etc. Add PVA pearls to some of the shells, and extra sparkle with glitter glue.
No comments:
Post a Comment