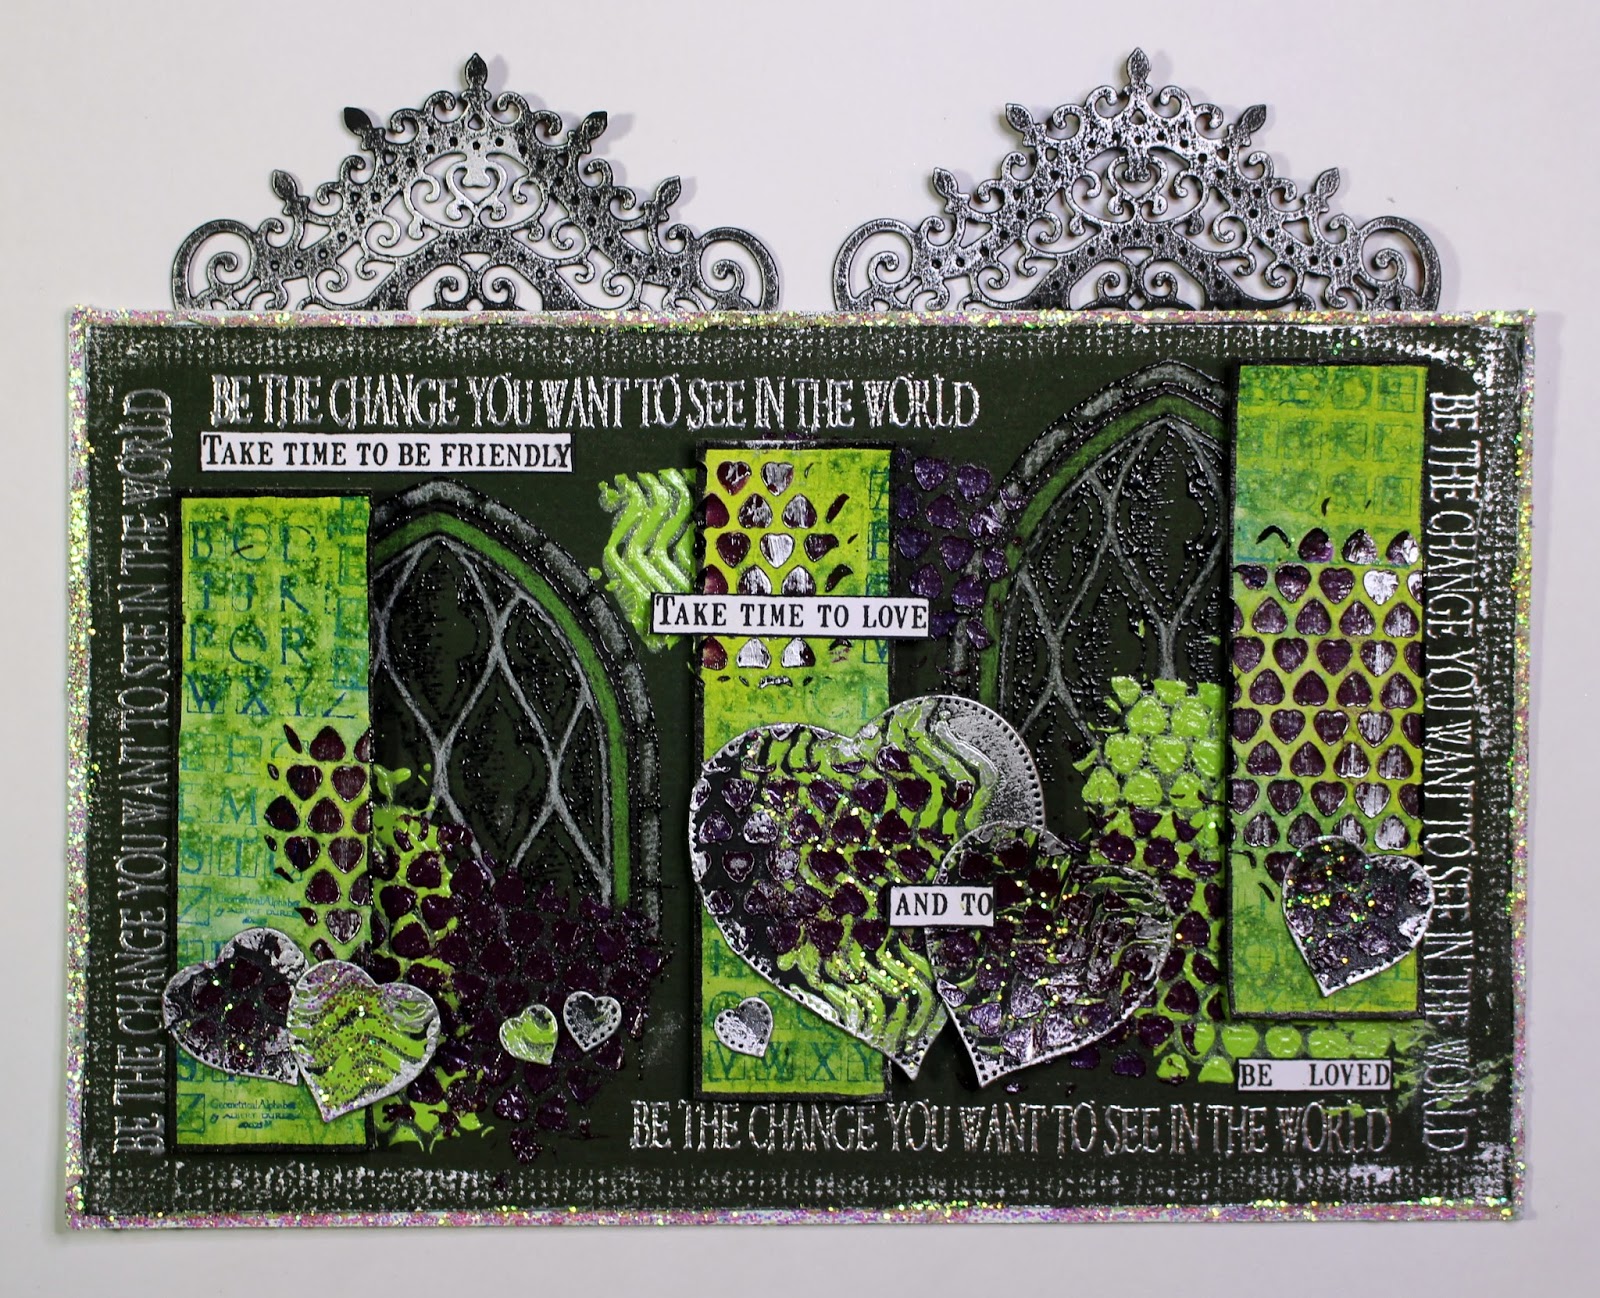
This was another of my recent TV show sample created for Chocolate Baroque on The Craft Channel using the Gothic Fragments stamp set. Sorry that it has taken so long to blog the details – never enough hours in a day – tee hee. I had a lot of fun making this one. Anne x.
- Words of Wisdom, Gothic Fragments and Mini Scripts stamp sets
- Dark green mount board, smaller piece of cream mount board, white stamping card, black card
- Inkpads: Versamark, Versafine (Black Onyx), Memories dye based (Blue)
- Fine detail embossing powders (silver, black)
- Spectrum Noir alcohol ink pen (black)
- Polychromos pencils (green, white)
- Mr Huey’s Color Mist Spritzers (Leaf Green and Sunshine)
- Viva Décor Kristall Gel (dark cerise – 501) and acrylic paint (lime)
- Pebeo Gilding Wax (Silver)
- Inscribe glitter glue (Mermaid)
- Heart sequin waste (to use as stencil) and Texturised stencil (Crafters Workshop – Ronda Palazzari)
- Dies: Pin Dot Hearts (Tattered Lace), Ornate Gateway (Heartfelt Creations), optional Small Easel (Tim Holtz BigZ die)
- 3D glue gel and foam pads
- Trim the mount board to approx. 22 X 14cm. Using a craft knife score a border around the edge and peel away the top layer of card from the edge.
- Stamp the ‘be the change ……’ sentiment around the edges with Versamark and heat emboss with silver powder.
- Stamp the verse onto white card with black ink and cut out sections to create the word embellishments. Edge with black pen.
- Stamp the arches onto the background panel with Versamark and heat emboss with black powder. Colour with green and white pencils. Apply glitter glue around the edges. Then lightly apply gilding wax around the edges to give a metallic distressed look.
- Spritz some cream board with the green and yellow sprays. Use the Mini Scripts stamp to add texture into the wet paints. Once dry stamp again with blue ink. Cut into three strips and edge with black pen.
- Die cut hearts from black card. Using a spatula apply paste or acrylic paint through the stencils to create added texture on the background, plus the hearts and smaller panels. Once dry apply more gilding wax.
- Die cut decorative ‘toppers’ from black card. Apply gilding wax to pick up texture, and glue to the back of the upper edge border.
- Mount the smaller panels with foam pads (to give even depth) and other embellishments with 3D glue gel.
2 comments:
This is unbelievably cool! WOW!!!
Thank you so much. Sorry to take so long to say that but generally monitor my Wordpress blog more than this one as I struggle a bit with blogger x.
Post a Comment