Here is a sneak peek of my samples.
I am an ex. Clinical Scientist, now self employed working in textiles and beadwork. I am also privileged to be on the Design Team for Chocolate Baroque, Beads Direct and Gina-B Silkworks. I hope that you enjoy this blog where I will be sharing some of my work including jewellery making, wire work, beading, embroidery, silk and fabric painting, felting, weaving, knitting, crochet and paper crafts.
Sunday, 14 May 2017
Sneak Peek of my samples for Chocolate Baroque starting on Hochanda this eve
Lesley Wharton is bringing a One Day Special starting this eve at 8pm on
Hochanda (Freeview Channel 85). More shows tomorrow at 9am, 12, 4 and 7pm.
Here is a sneak peek of my samples.
Friday, 12 May 2017
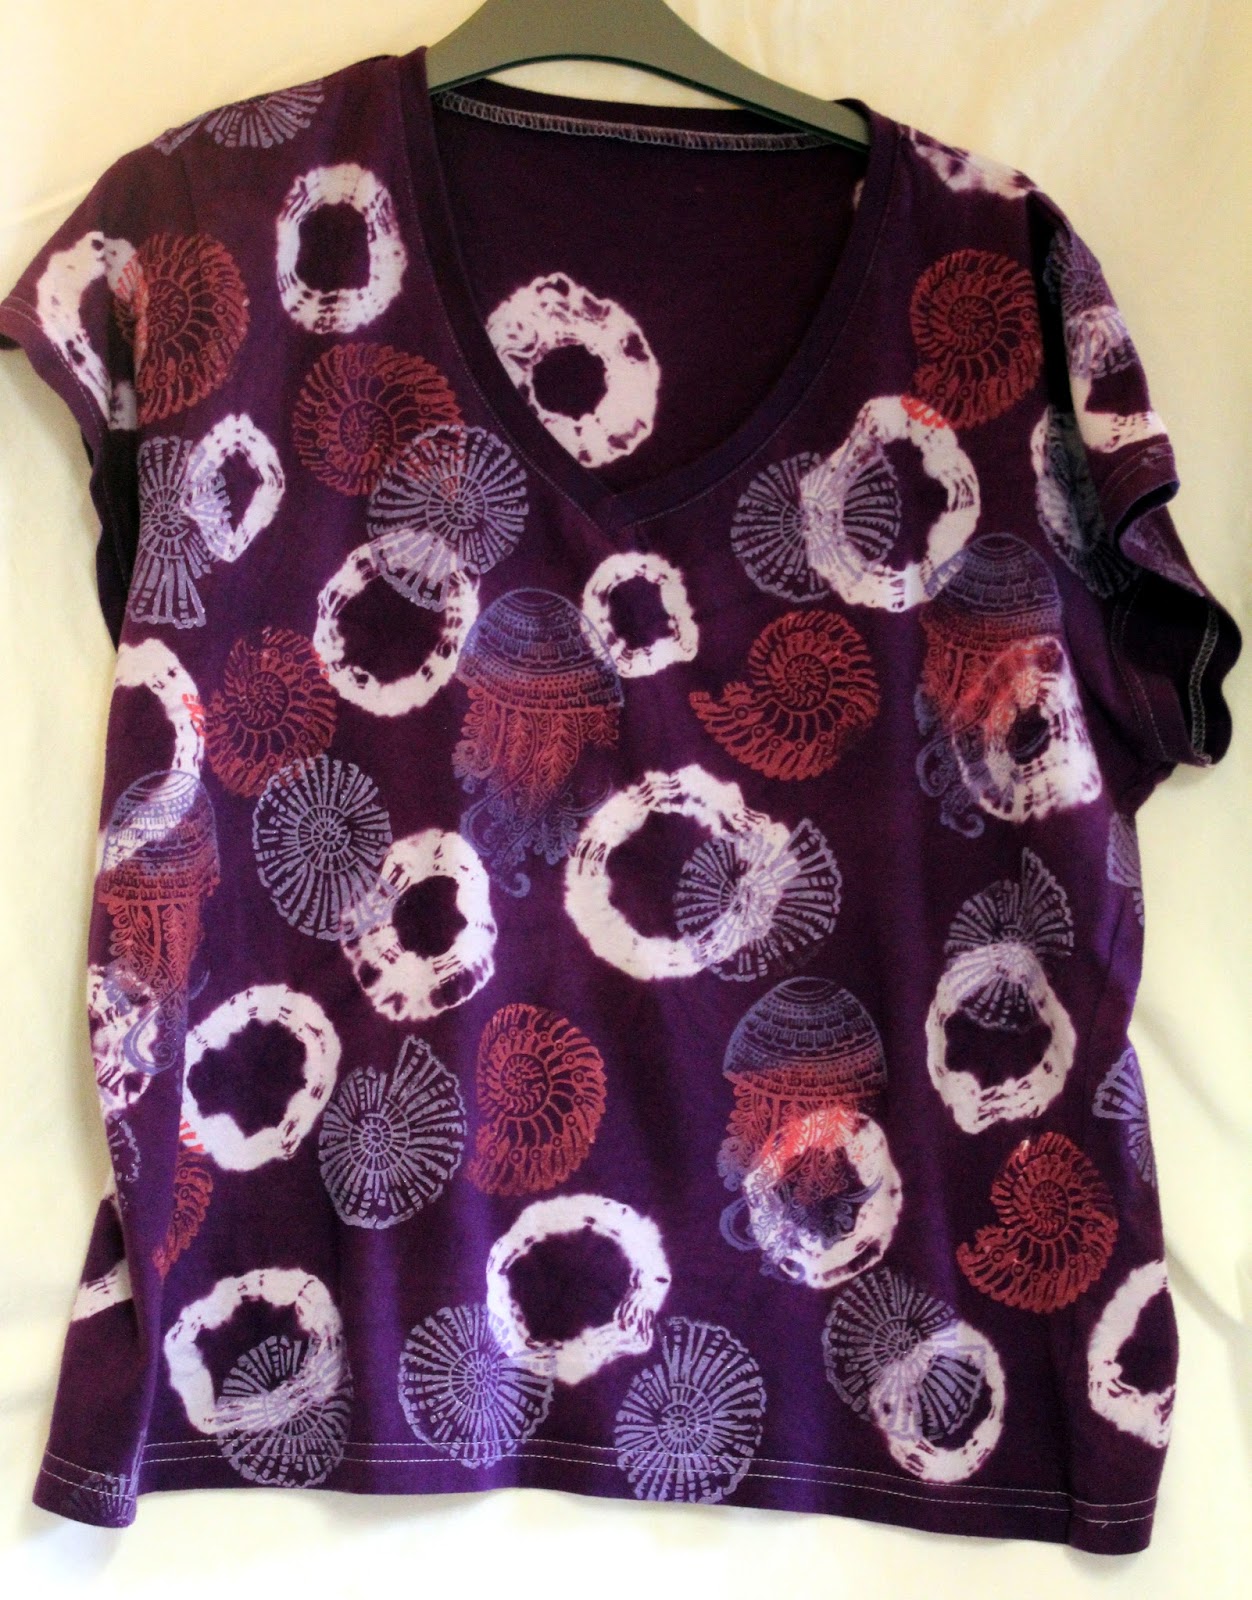
Tie dyed and block printed skirt and top
I had been meaning to dye and decorate these for ages – a white T shirt and very pale denim skirt
(white to pale blue dip die effect).
I used one of the old multipurpose Dylon dies in the washing
machine (they now have an alternative formulation for natural fabrics such as
cotton). I really didn’t spend a lot of time. I decided where I wanted the
motifs and made a small mark with chalk. I placed a chop stick tip behind the
placement mark and made a sort of tent shape. Then I simply wrapped it with
elastic bands and pulled out the stick. I found this a really quick and easy
method. I then dyed in the washing machine with salt (according to packet
directions). I love the way that the polyester stitching didn’t pick up the die
– nice design detail.
Looking at the results the rings reminded my somewhat of
floating jelly fish so I decided to block print and create a sort of ‘under the
sea’ theme.
I over printed the design using iron fix fabric paints and
printing blocks from Colouricious.
Butterfly Wishes card created for Chocolate Baroque
Good morning. Today I am sharing another of my samples for the recent shows on Hochanda.
I played with the butterfly stamp from the Spring Fairies April set. I used a stamping gear to create the wreath but you can achieve the same by drawing a circle (lightly in pencil), placing a little mark at 8 points around it and stamping freehand. Stamp and turn the card, stamp again keeping the angle of your stamp constant.
A simple wreath stamped onto a plain background, perhaps with variegated inks, would look quite pretty too.
Materials:
- Spring Fairy Collection (April) and Words to Dazzle & Sparkle stamp sets
- 6X 6 inch white scalloped card blank, plain card (black and white) and silver mirror card (plus ready made scalloped frame)
- Inkpads: Versamark and StazOn (Black)
- Embossing powders: white detail and silver tinsel (with glitter)
- Clear glitter glue
- Inkadinkadoo Stamping Gear
- Trim the black card panel and stamp the sentiment in the centre with Versamark. Heat emboss with white powder.
- Randomly stamp the butterfly with Versamark. Heat emboss with the silver powder. Glue to the card front along with the silver frame.
- Stamp the butterfly wreath onto silver mirror card with StazOn ink. Cut around the outside and layer onto white card. Trim around the outside to leave a white border and cut out the centre. Layer onto the card with foam pads.
- Finish with dots of glitter glue for added sparkle.
Tuesday, 2 May 2017
Welcome to Fairyland card created for Chocolate Baroque
Good morning. Today I am sharing one of my samples for the recent shows on
Hochanda. I had so much fun with these stamps. I hope that you like my fantasy
scene.
Materials:
Materials:
- Spring Fairy Collection (May), Fantasy Castles, Magical Landscapes and Welcome to Fairyland stamps
- 7 inch square card blank, black card, white stamping card
- Versafine Inkpad (Onyx Black)
- Watercolour masking fluid (Pebeo Drawing Gum)
- Spectrum Noir Aquatints - water based inks (yellow, red, purple, greens)
- Watercolour pencils (greens, blues, browns, pinks)
- Clear sparkle pen
- Fine tipped marker pen and alcohol marker (black)
- Glossy Accents
- Glitter glue (aqua)
- Decorative corner dies (Tonic)
- Stamp the scene with Versafine and extend the scene by drawing with the fine tipped pen.
- Cover the moon, rocks, castle and fairy wing with masking fluid.
- Colour the scene using inks, remove a little colour from the clouds with a wet brush and blotting with paper towel. Note: you can only do this with certain inks (some set into the paper and cannot be lifted after dry, so you may need to work quickly to lift colour while still wet). Dry and remove the masking.
- Colour the images with watercolour pencils and blend the colours with a damp brush.
- Apply sparkle pen over the moon, fairy wings and sections of the sky.
- Edge the card with black alcohol pen and mount onto black card. Glue to card front adding decorative die cuts to corners.
- Add Glossy Accents to the fairy and finish with glitter glue for added sparkle.
Sunday, 30 April 2017
Mixed media fossil canvas
I have completed another mixed media canvas with a fossil theme. Going
through a Jurassic phase at the moment – tee hee.
The main image was created with acrylic texture and crackled pastes using the fossil stencil from Andy Skinner. I also used glitter paste and microbeads for added texture. When dry I also drizzled some Pebeo Fantasy (Moon and Prisme) and glass paints into the crevices.
The canvas background surround was created with acrylic media (sentiment stamp and dies from Sheena Douglass).
The main image was created with acrylic texture and crackled pastes using the fossil stencil from Andy Skinner. I also used glitter paste and microbeads for added texture. When dry I also drizzled some Pebeo Fantasy (Moon and Prisme) and glass paints into the crevices.
The canvas background surround was created with acrylic media (sentiment stamp and dies from Sheena Douglass).
Friday, 28 April 2017
Exciting news: I am joining Gina B Silkworks
I am still pinching myself. I will be working with the fabulous Gina Barrett
and her Design Team and Gina-B Silkworks – helping out with samples for her shows on
Create & Craft TV. I have admired her work for so many years. As an added
Bonus I will also working with the talented Chris Offa and
Gillian
McMurray. So excited.
Gina will be on Create & Craft tomorrow at 10am launching a new kits and instructions for creating gorgeous Teneriffe Lace (UK Freeview Channel 23 or watch live or on catch up online from the website).
These are my first experiments with the technique – I am going to put mine into an oriental style mixed media canvas. I will share when I have finished.
Gina will be on Create & Craft tomorrow at 10am launching a new kits and instructions for creating gorgeous Teneriffe Lace (UK Freeview Channel 23 or watch live or on catch up online from the website).
These are my first experiments with the technique – I am going to put mine into an oriental style mixed media canvas. I will share when I have finished.
Wednesday, 26 April 2017
Harlequin Rose card created for Chocolate Baroque
Good morning. Here is my contribution to the Chocolate Baroque Colour Challenge this month. I used the lovely Harlequin Rose stamp.
Materials:
- Harlequin Rose stamp set
- Kraft card blank, brown card and white stamping card
- Inkpads: Distress Ink (Mustard Seed, Barn Door, Gathered Twigs, Peacock Feathers), Versafine Inkpad (Vintage Sepia)
- WOW Embossing Powder (Clear Gloss)
- Spectrum Noir Sparkle pen (clear)
- Fine tipped pen (brown)
- PVA pearls and ribbon (turquoise)
- Decorative dies
- The main image was stamped with Versafine and embossed with clear powder. I coloured it with Distress Inks and added some sparkle with clear sparkle pen.
- The image was cut out using a die. Whilst the shape was still in the die I coloured it with gathered Twigs Distress Ink around the edges. I then removed the shape and added faux stitching around the edge.
- I cut the background mat in brown card, layered everything up and glued to the card front, adding the ribbon strip.
- Finally finished with PVA pearls.
Subscribe to:
Posts (Atom)